How to add team members to Madgicx
Adding team members to Madgicx helps you manage your ad accounts efficiently, especially for agencies or advertisers managing multiple accounts. In this article, you’ll learn how to:
- Create a Madgicx workspace
- Invite team members to join your workspace
- Accept a Madgicx team invitation
- Assign permissions to your team
- Remove workspaces

Madgicx lets you add team members to work together on the ad account(s) you manage. Whether you’re a business owner working with a team or an agency with multiple clients and ad accounts, you can use Madgicx collaboratively.
First, you need to create a workspace. Here’s how to set it up.
Create a workspace
When you first sign up for a free trial of Madgicx, you are guided through setting up your account, which includes creating your workspace. You should name your workspace, enter the details to complete the rest of the form, and click “Save.”
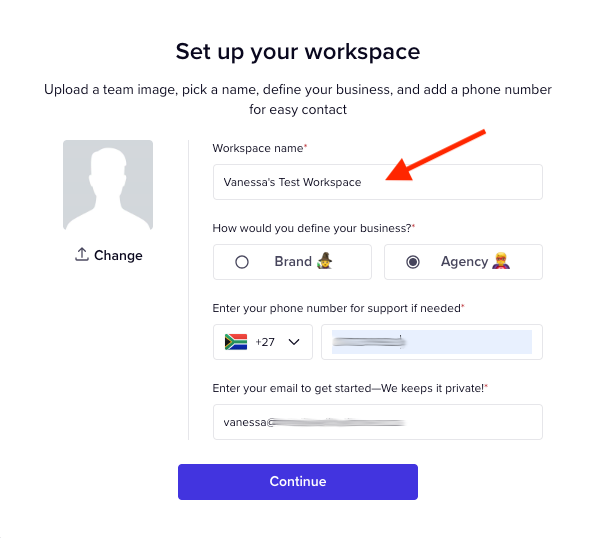
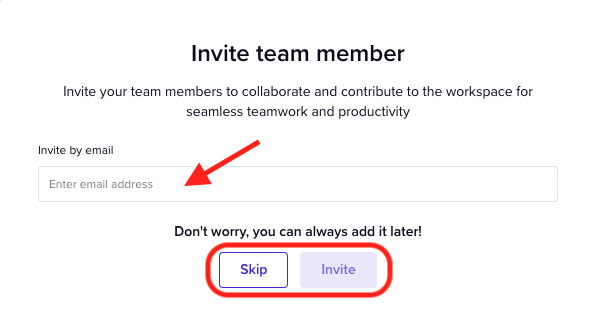
In the next step, you have your first opportunity to add a team member by entering their email address. You can add up to 60 email addresses. Just hit “Enter” after each address to add it. You can also click “Skip” to do this later. I will cover this in more detail in the next section. Complete the signup flow to set up your Madgicx account.
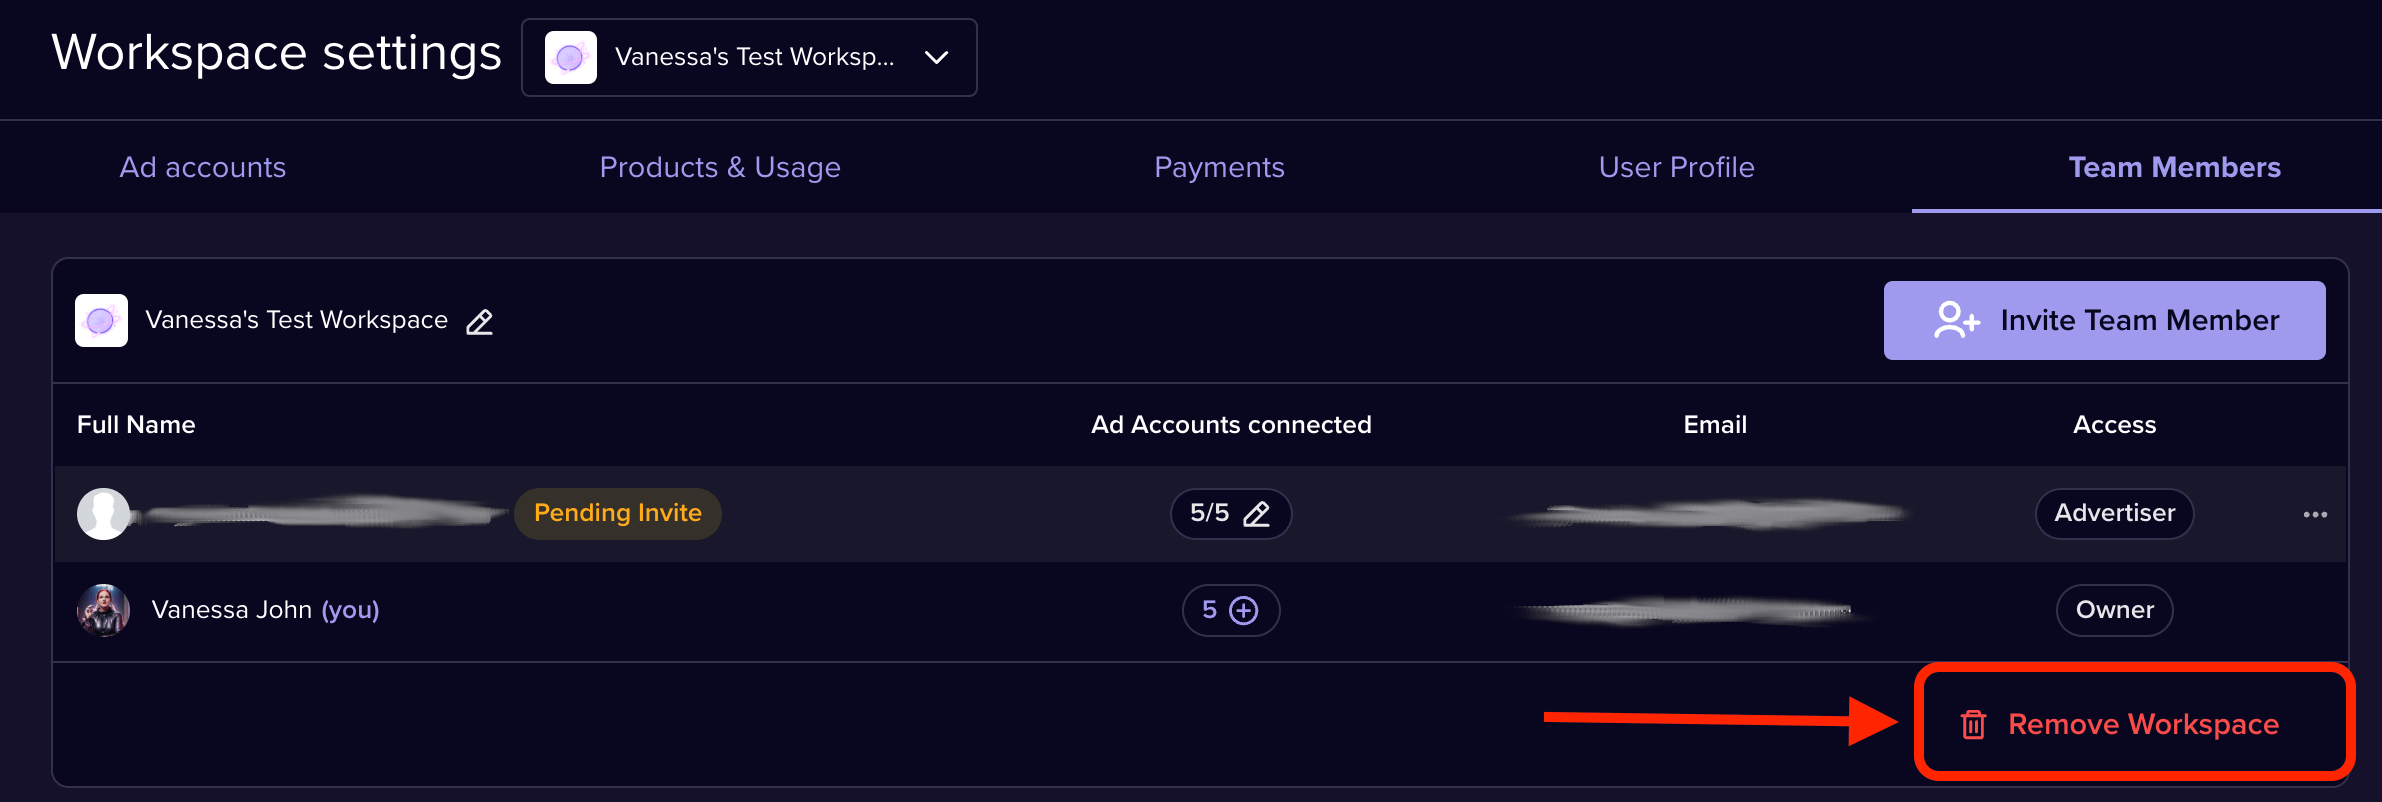
You can find your workspace inside the app by clicking your profile picture at the bottom left, then selecting “Manage connected ad accounts,” and finally navigating to the Team Members tab. Your workspace appears at the top of the list of team members. You can edit your workspace name by clicking the edit pencil.

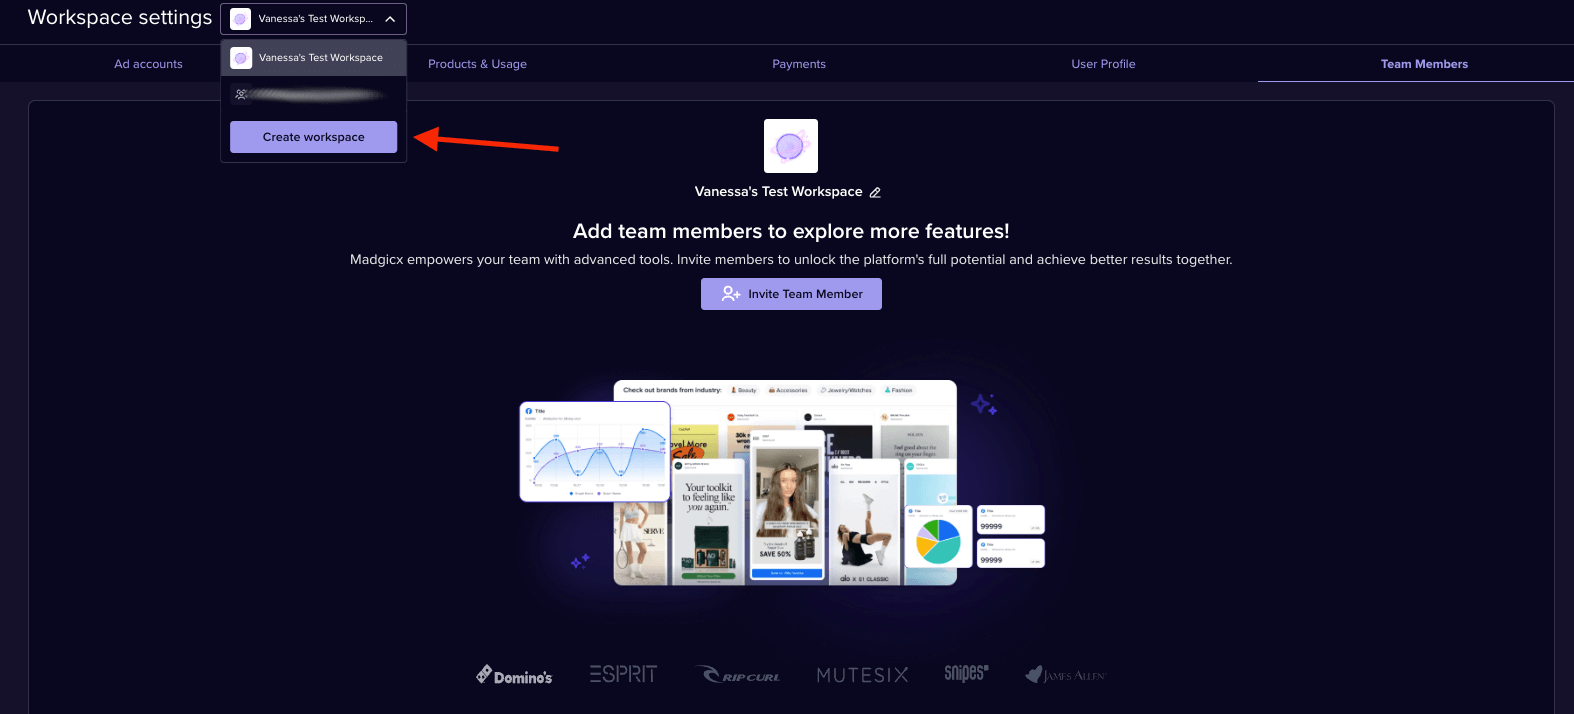
While you may only create one workspace, you can be a member of multiple ones in Madgicx. Change workspaces by clicking the arrow next to the workspace name to open a dropdown menu where you can select the one you want to work in.
Owner vs. admin vs. advertiser permissions
As a workspace owner, you control the ad accounts your team members can access. Your team members have access to your Madgicx plan and the ad accounts you assign them. As a workspace owner, you can be added to other workspaces as an advertiser or an admin.
As an admin, you have most of the same permissions as the owner to help manage your workspace. This makes managing your team and your subscription plans easier for teammates. For example, finance can access billing documents, etc. It’s important to note that as a workspace admin, you will only have access to ad accounts connected to the owner’s subscription plan.
As an advertiser, you don’t have your own Madgicx plan. You are assigned access from the workspace owner’s Madgicx plan. You will have the same level of access as the owner when managing the ad account in question. If you want to create your own workspace, you will need to subscribe to a Madgicx plan.
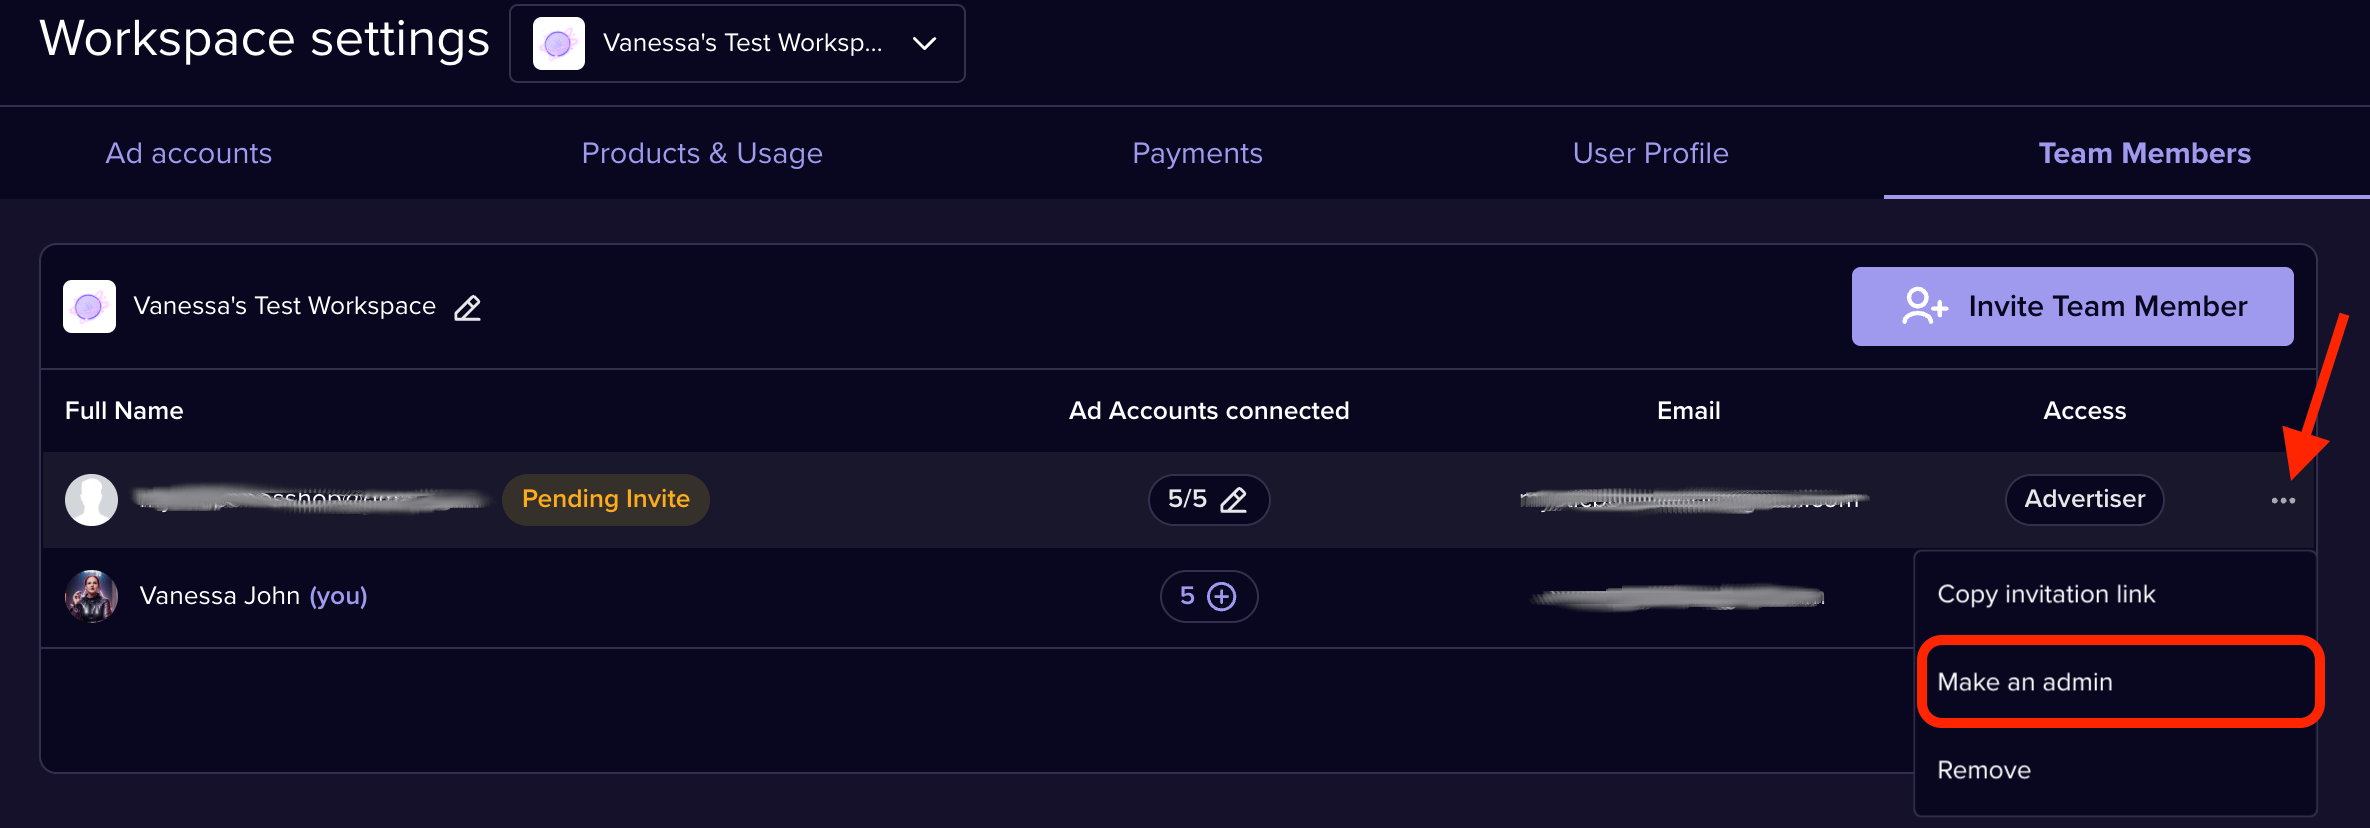
By default, all new users added to a workspace are advertisers. To grant admin access, you need to go to “Workspace settings,” then “Team Members,” click the three dots to open the menu, and select “Make an admin.”
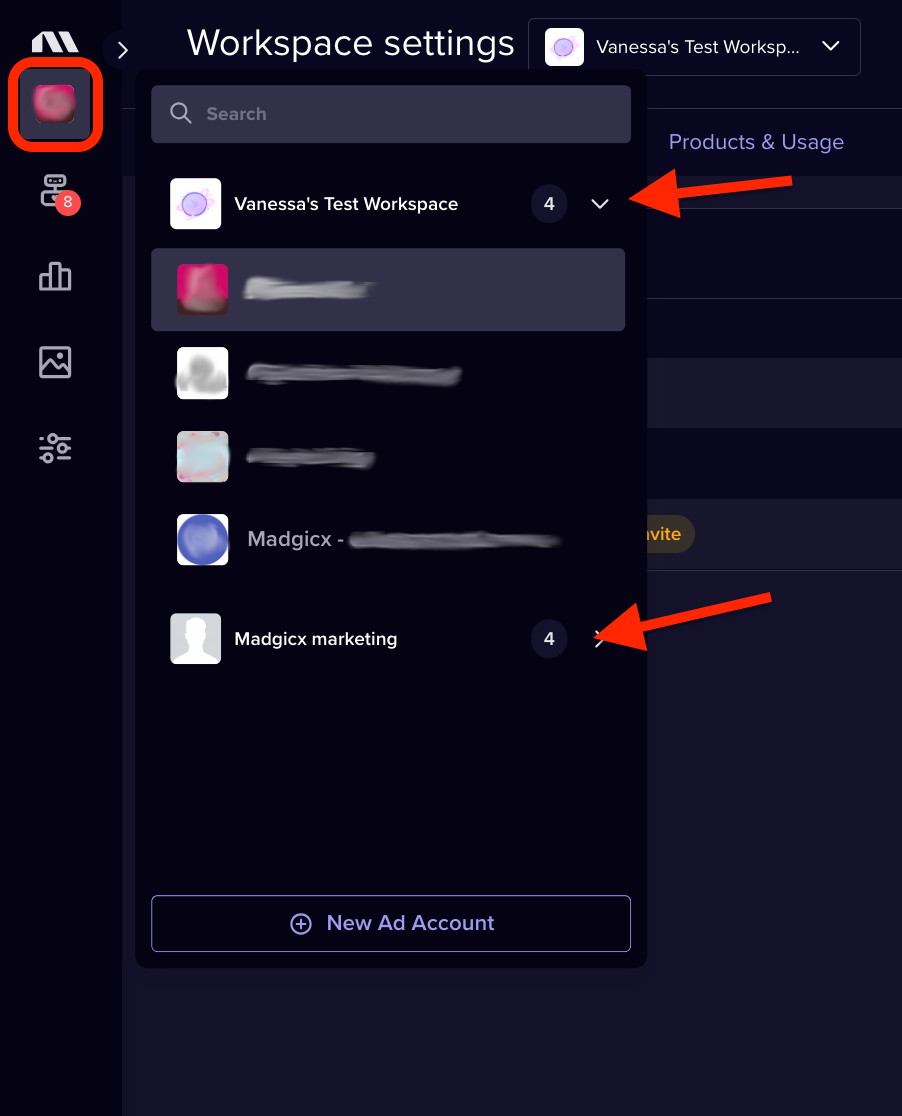
Note: If you have an existing Madgicx account and someone assigns you to their team, you can access their workspace in the same place where you switch ad accounts - the ad account icon at the top left of the page. You will remain subscribed to your plan as an existing Madgicx user, but the above advertiser rules apply to the ad accounts assigned to you in the new workspace.
Invite team members
To add a team member to your workspace, click the purple “Invite Team Member” button at the top right in the Team Members tab in your settings.
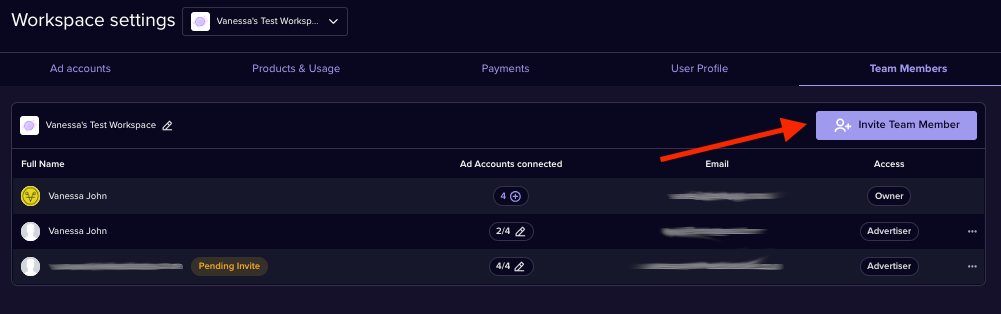
A pop-up will open where you can enter the email addresses of those you want to invite to join your workspace. To add multiple people, hit “Enter” after typing an email address to add another (you can add up to 60 people). Click the “Invite” button when you’re done.

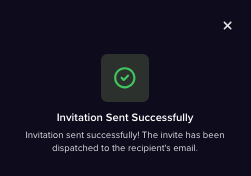
You’ll see a confirmation message that the email invitation was sent.
Note: If a team member doesn’t receive the email invitation, the owner can copy the invitation link and share it with the team member they’re inviting. Click the three-dot menu at the far right of that person’s name in your list of team members to copy it.

Accepting an invitation to join Madgicx
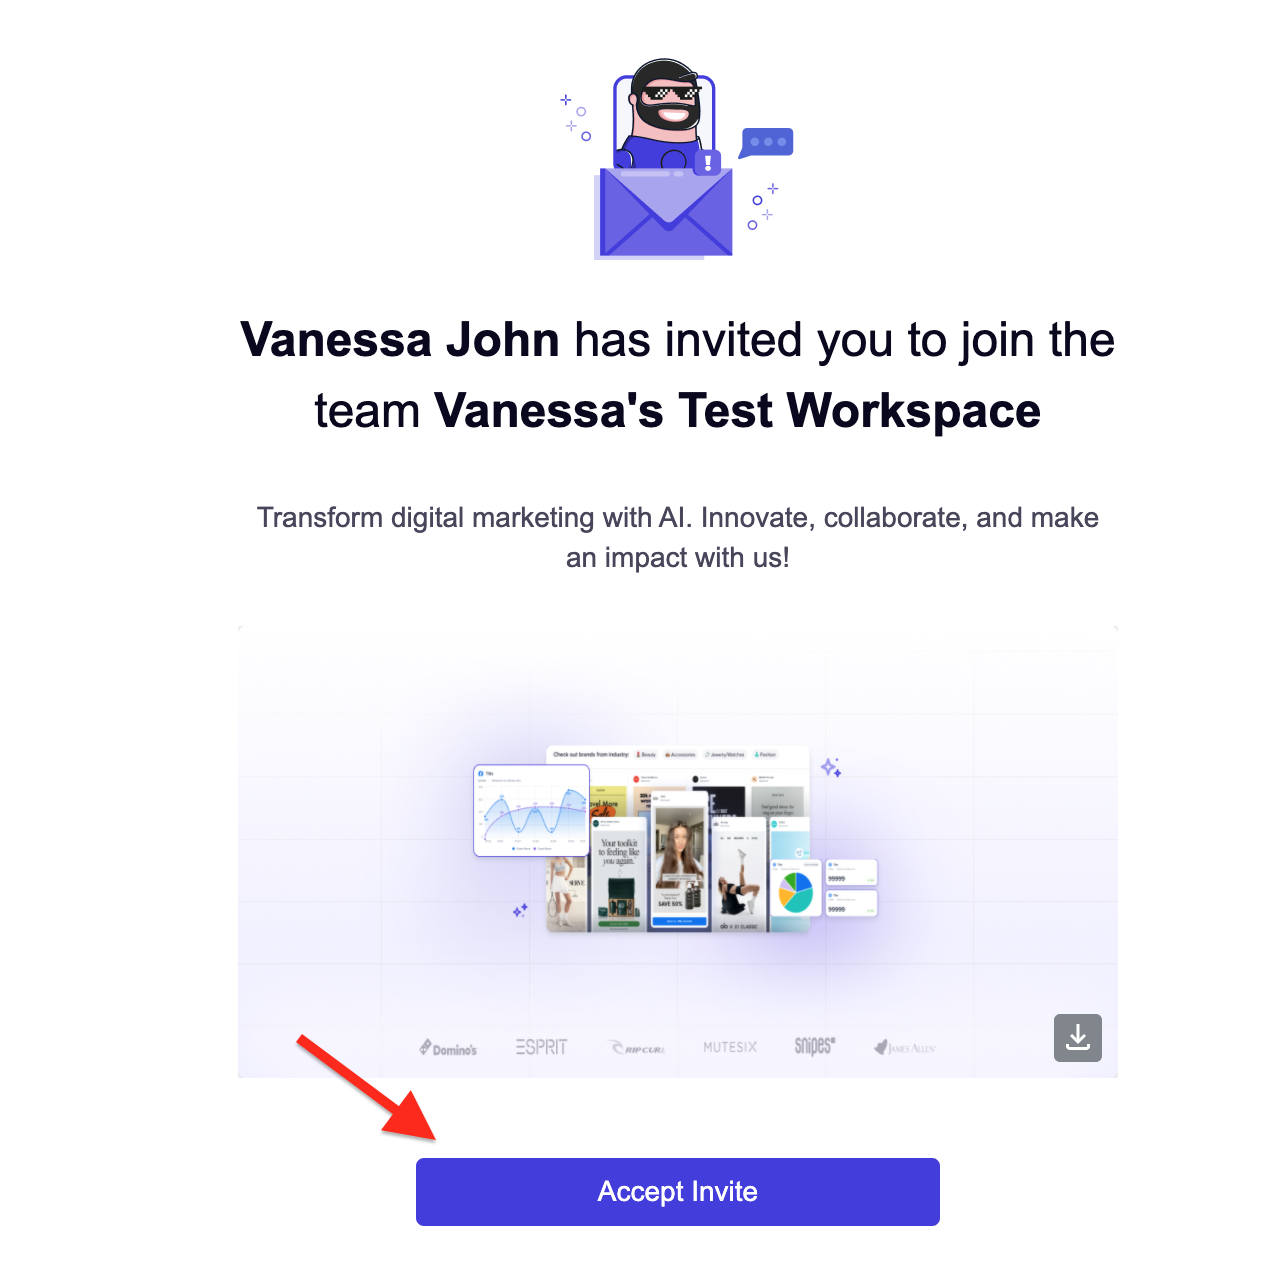
If you were invited to join someone’s workspace, you will receive an email from admin@madgicx.com. If you don’t see it, check your spam folder.
Click the purple “Accept Invite” button in the email to open a link to set up your Madgicx account.
Until you complete this process, you won’t be a member of the workspace. If you don’t receive the email invitation, please ask the workspace owner to share the invitation link with you (see instructions above).
Grant access to ad accounts
As a workspace owner, you can control which ad accounts your team members can access. Your team members will only be able to access ad accounts that you are an admin of and that are added to Madgicx and included in your subscription (you can check this by clicking on your profile picture at the bottom left, then “Manage connected ad accounts”).
On the “Team Members” tab, click the edit pencil next to the number of ad accounts connected to a team member.

A pop-up will open showing the ad accounts you manage in Madgicx. Tick the boxes of the ad accounts you want to assign to that team member and click “Add Now” to save your selection.
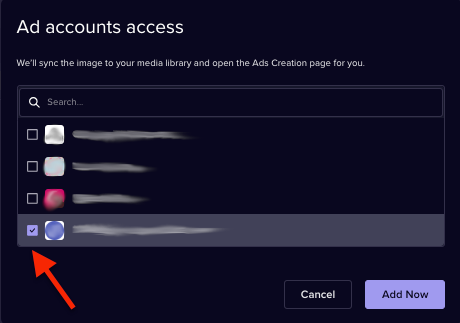
The team member will now have access to these ad accounts.
Create multiple workspaces
Create additional workspaces by clicking the drop-down menu showing your current workspace and clicking the “Create Workspace” button to make a new one. Keep in mind that with every new workspace, you create a new Madgicx subscription.
You can be added to multiple workspaces, too.
Note: The workspace owner is the one with the Madgicx subscription. You won't be charged for that account if you’ve been added as a team member. However, if you create a new workspace, you will need a new subscription.
You can also switch workspaces at the top left of the page, where you can select the ad account you’re working on.
Remove workspaces
If you need to remove a workspace, you can do so by clicking the red “Remove Workspace” button at the bottom right of your workspace details.
If the workspace you’re trying to delete is connected to an active subscription, you will be asked to cancel your subscription. If you have an active plan, you will only be able to delete the workspace after cancellation. Workspace removal is auto-scheduled for the end of the billing period in this instance.
Note: You can cancel additional workspaces as long as at least one workspace remains.
Why can’t I see the other ad accounts I manage as a team member?
You are only granted access to ad accounts by the workspace owner and to ad accounts the workspace owner has connected. If you want to manage your own ad accounts in Madgicx, you must purchase a Madgicx plan.
Related lessons
Didn't find what you were looking for?
Try our FAQ
Check out the answers to our most frequently asked questions. If you can’t find the answer there, you’ll be able to contact our support team.