Create Meta ads using the AI Ad Generator
Harness the power of Madgicx’s AI to generate thumb-stopping ads. You can:
- Use text, images, or existing ads to prompt the AI Ad Generator
- Generate ads based on your existing ads or your favorites in the Madgicx Ad Library
- Edit your creations using the AI Image Editor to alter text, erase, or move elements
Leverage AI to supercharge your creative production
The latest addition to the Madgicx tool arsenal helps you keep up with the demands of consistent ad creation. Designing enough ads to keep the profits rolling in is a lot of work. Never mind that coming up with fresh ideas for your next ad is a job in itself. Enter the AI Ad Generator.
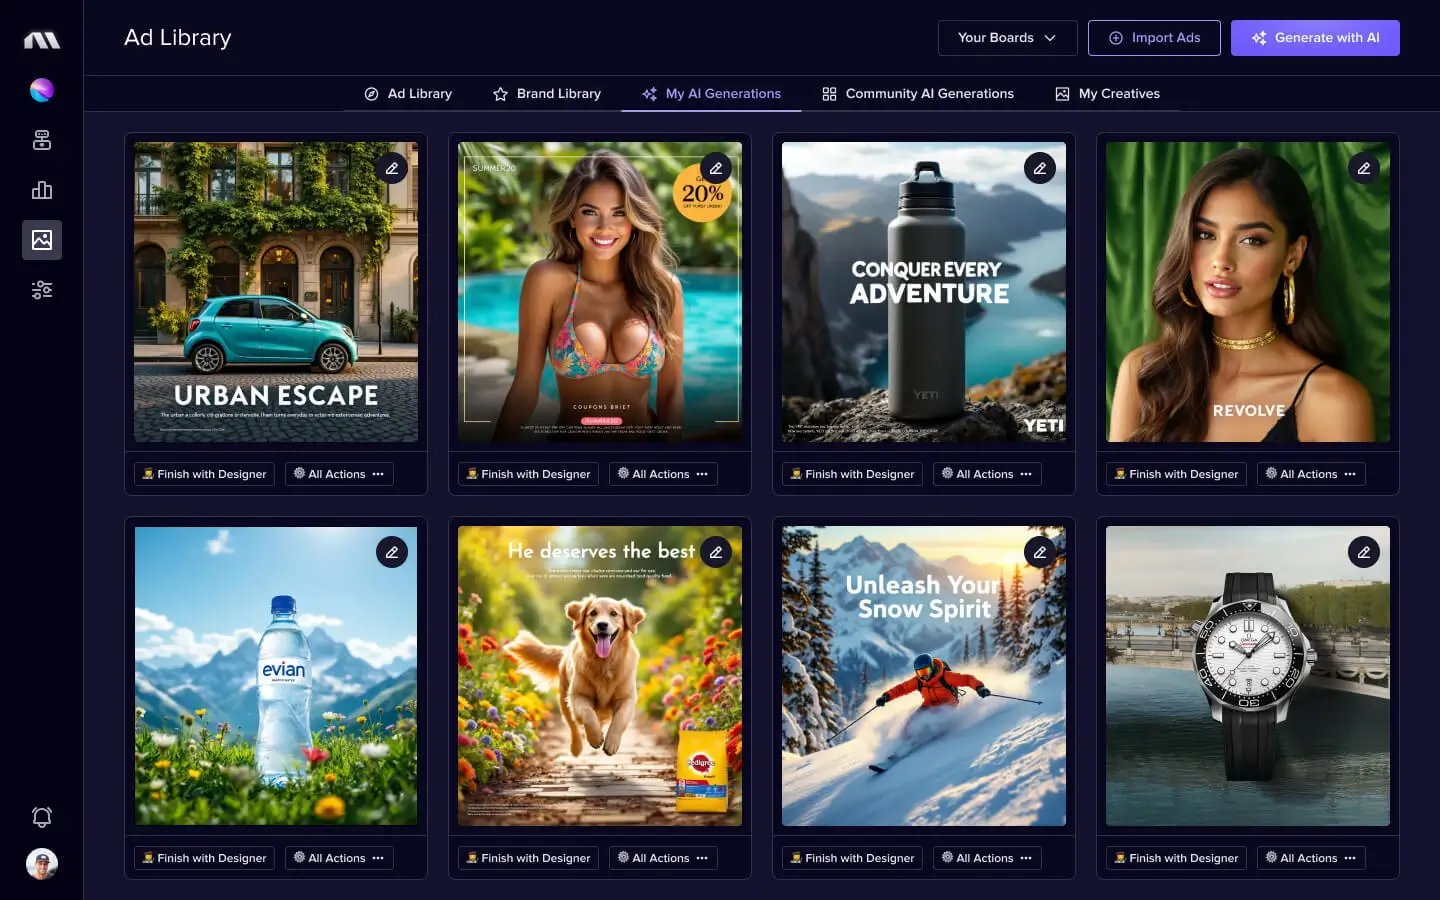
Use your existing ads to generate more creatives like your best performers! From the “My Creatives” tab, you can choose ads based on their performance to use as prompts. You could also upload an image or type a description to tell the AI Ad Generator what you want in your ad. Additionally, if you’re inspired by an ad you saw in the Madgicx Ad Library, you can upload it to the AI Ad Generator to recreate your own version.
Using the AI Ad Generator lets you streamline and scale your creative production, save time, and enjoy the convenience of it all happening in one app… Madgicx 💫
How to create ads with the AI Ad Generator
First, go to the creatives menu on the left side of the Madgicx app and click “AI Ad Generator.”
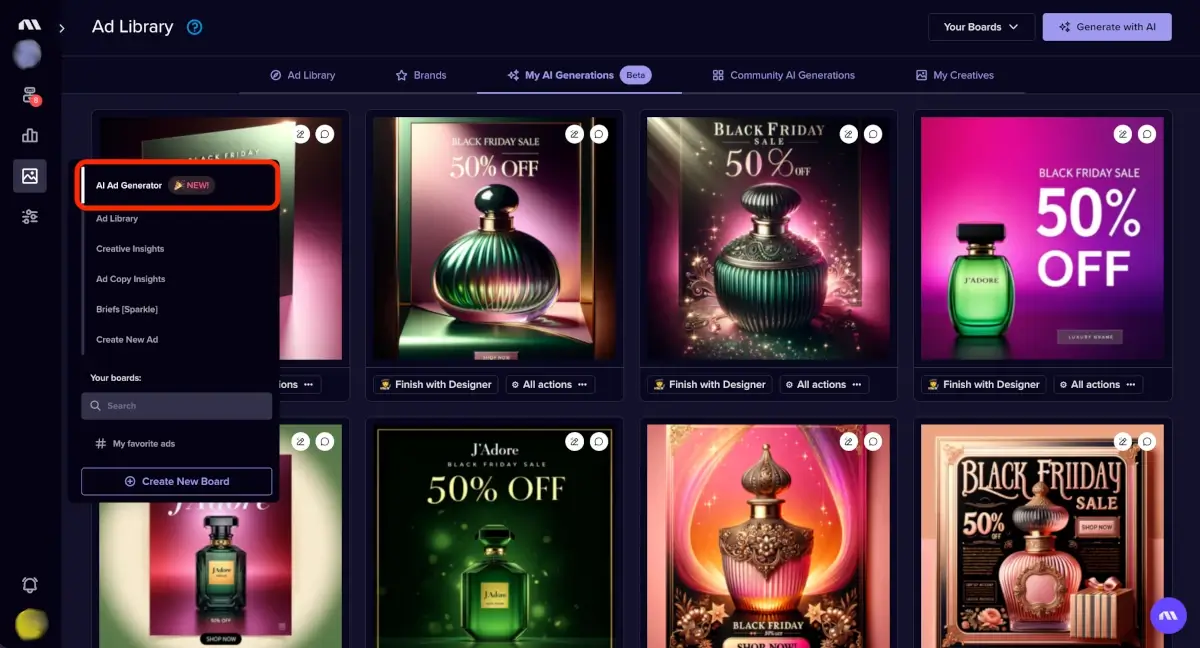
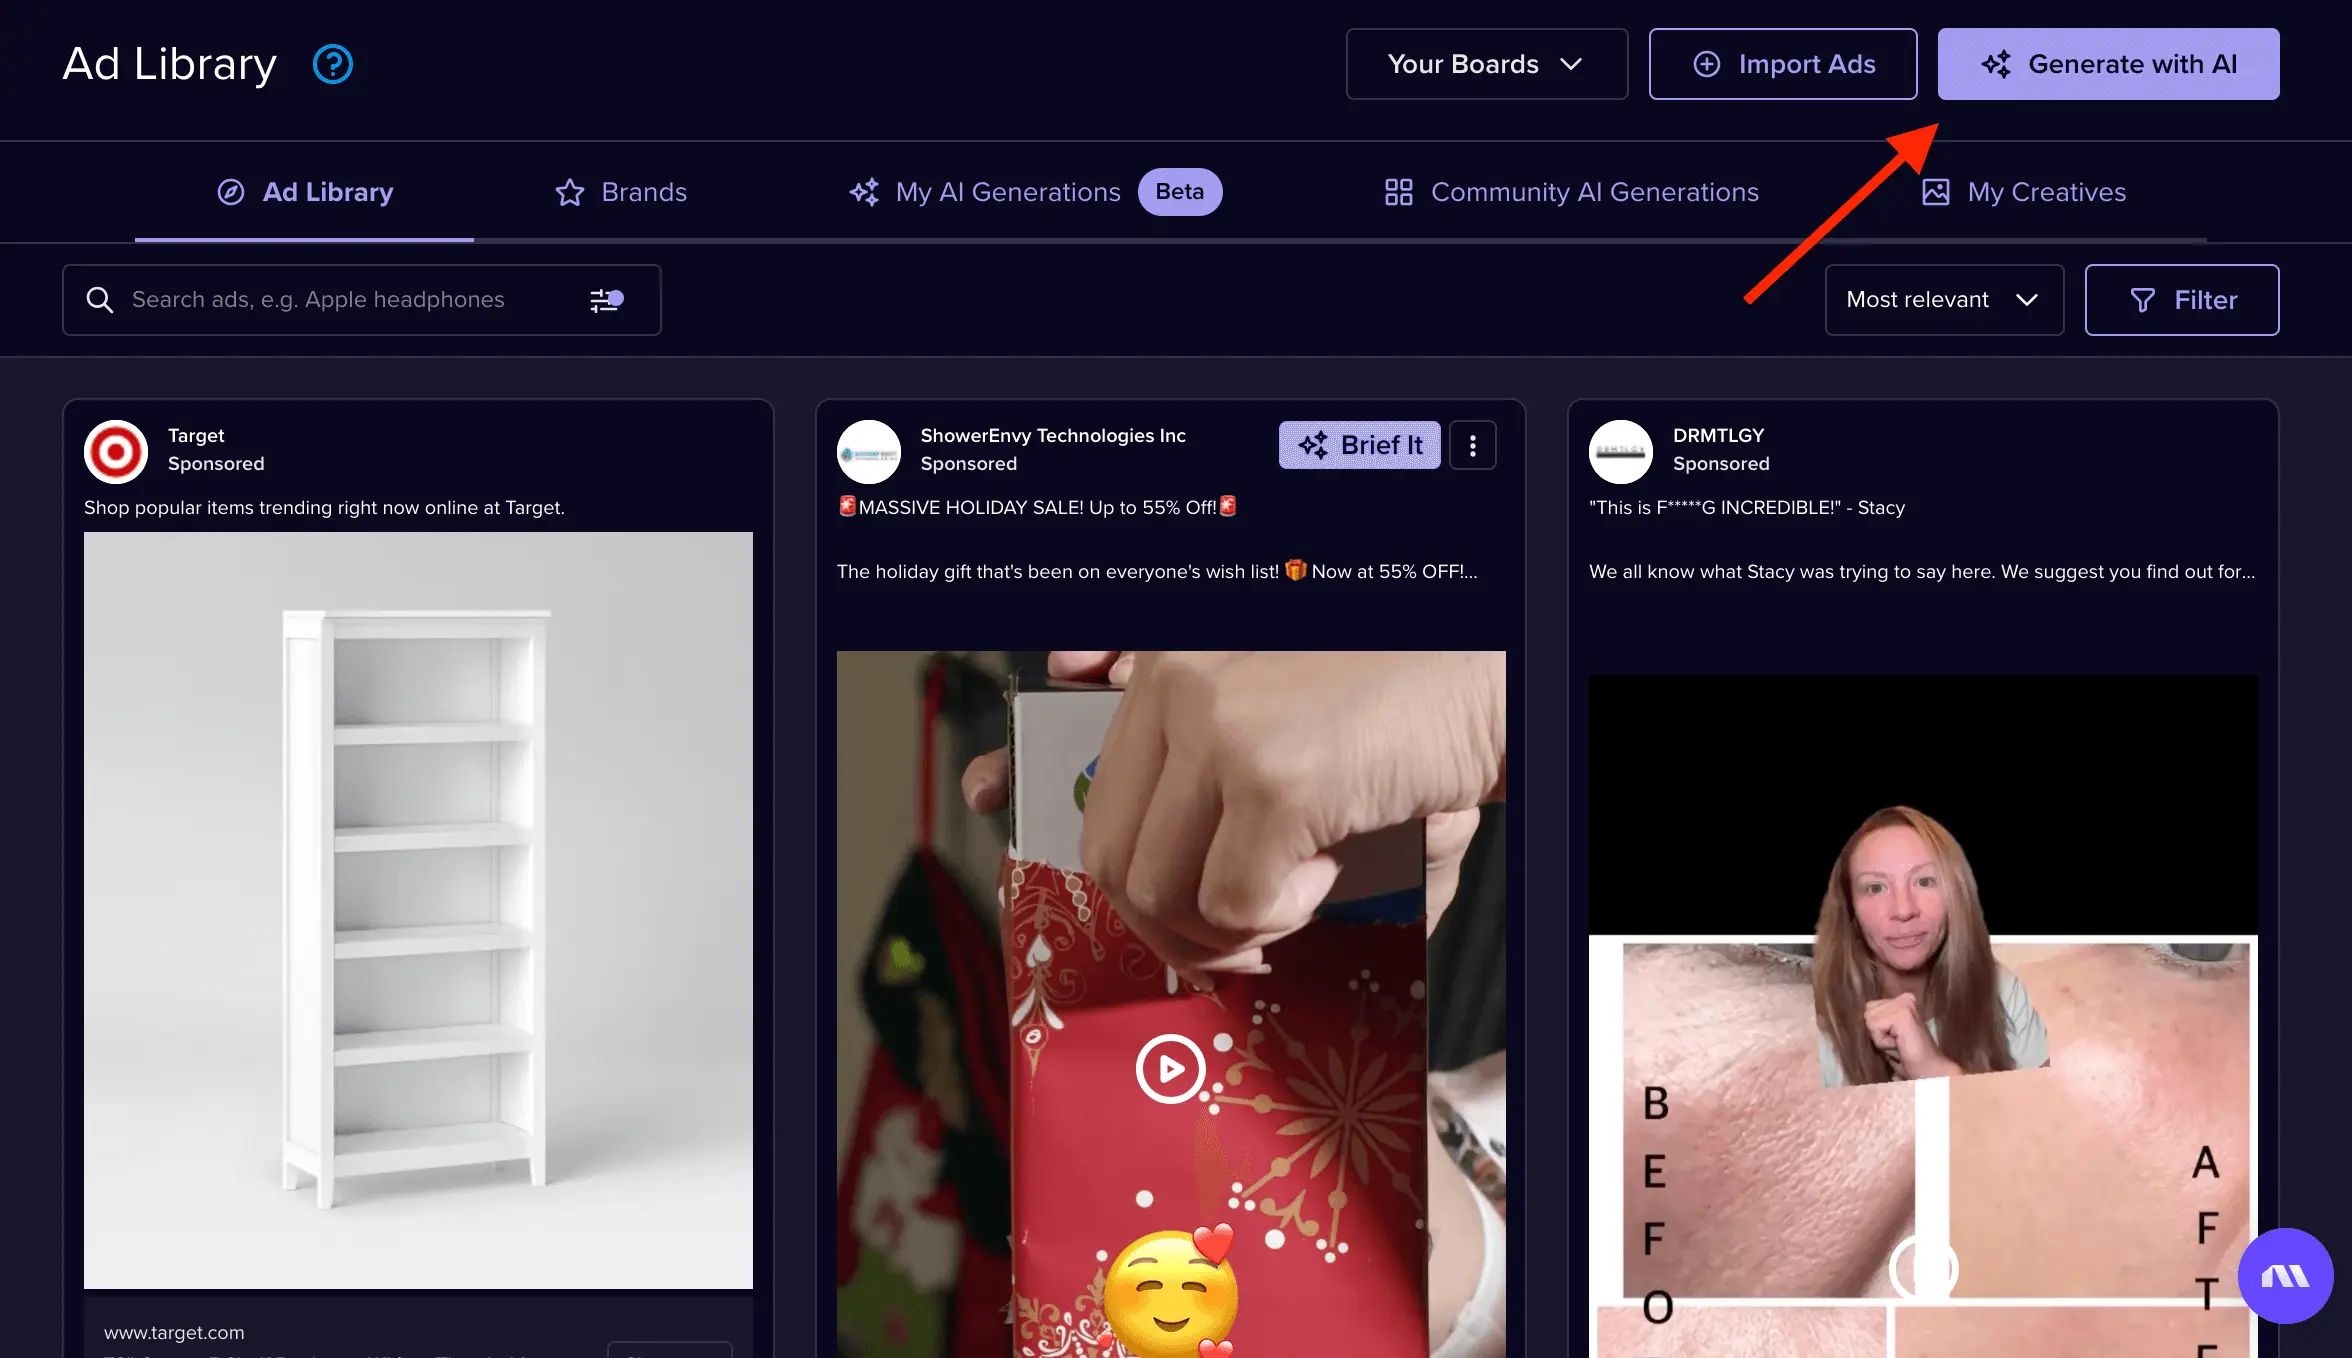
You’ll see a tab menu at the top of the page with “Ad Library,” “Brands,” “My AI Generations,” “Community AI Generations,” and “My Creatives,” and a button at the top right that says “Generate with AI.”

Create a new AI ad image from your existing creatives
In the “My Creatives” tab, you’ll find the Meta ads you launched previously. If you hover over an image ad, you’ll see the Ad Gen AI button. Click it to use that image to prompt the AI Ad Generator to create a new batch of creatives based on your ad.
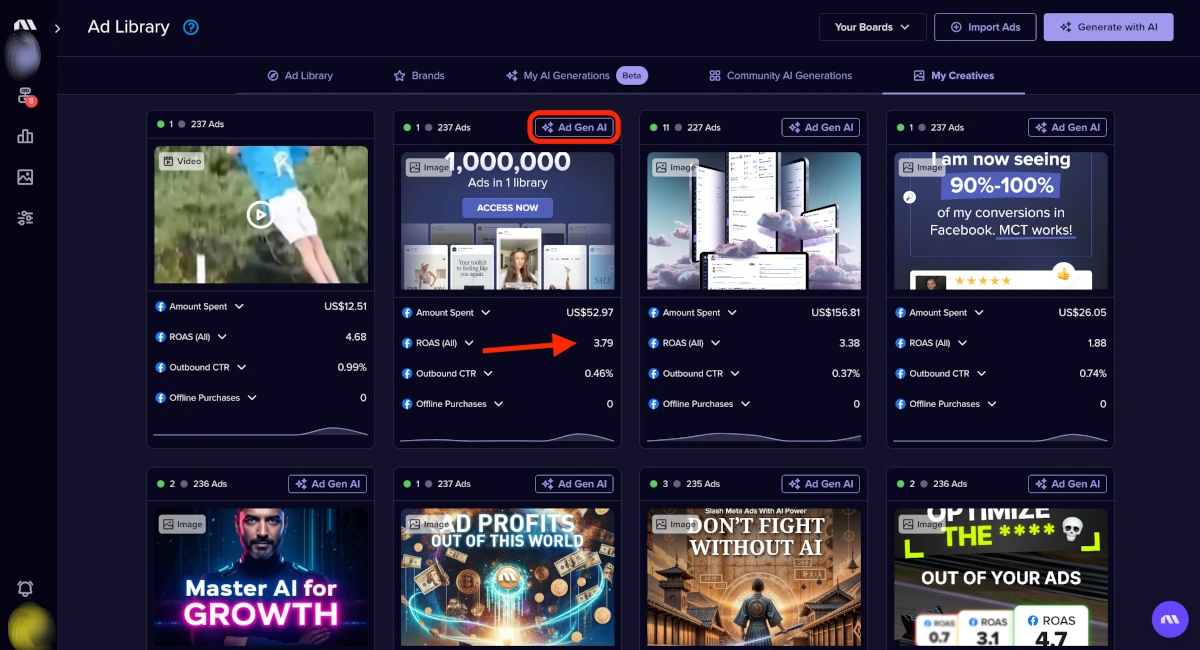
Pro tip: Choose an ad that’s performed well before to create new and different variations on what’s worked in the past. They’re already sorted for you based on their performance (ROAS) to make your job easier.
The prompt popup will appear, and you can slide the “Advanced options” toggle to write a text description of your new ad.
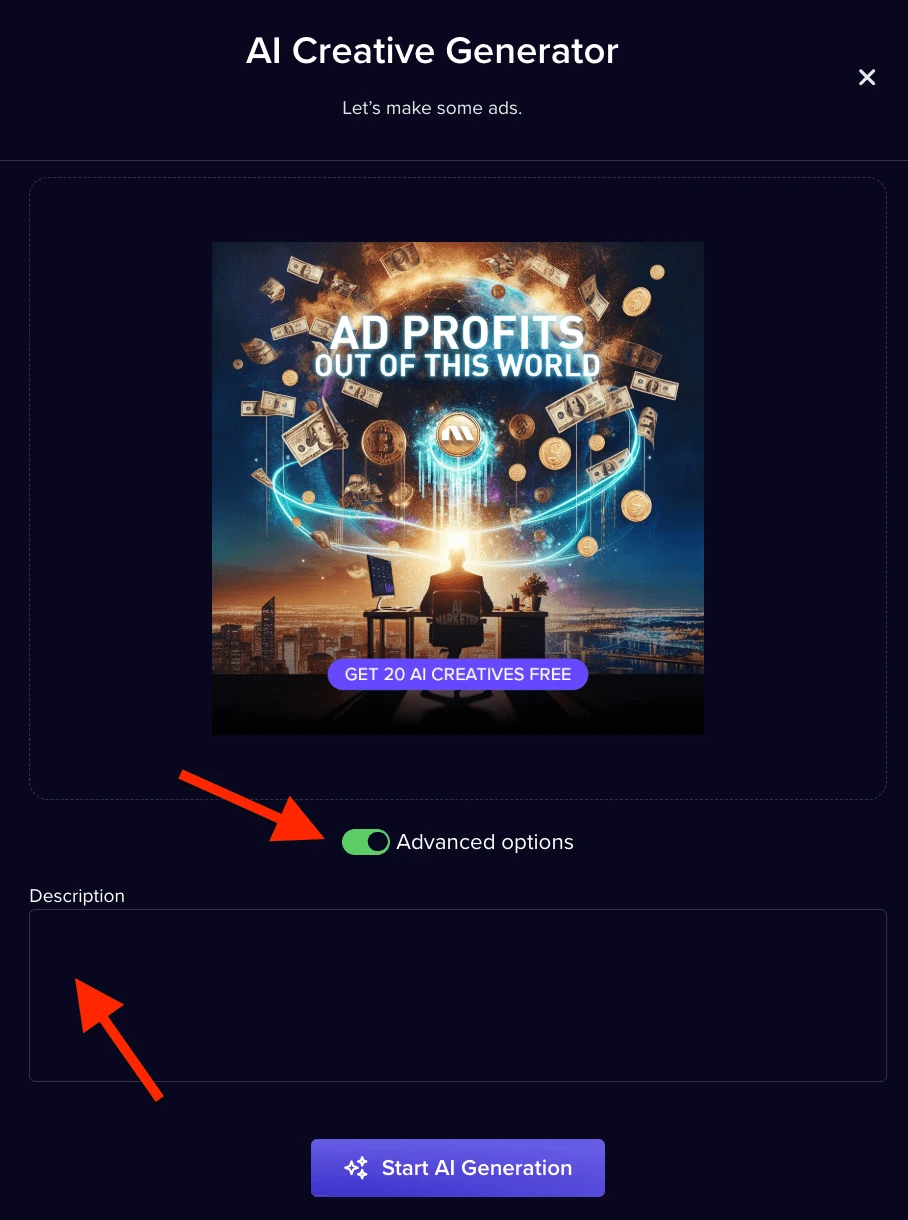
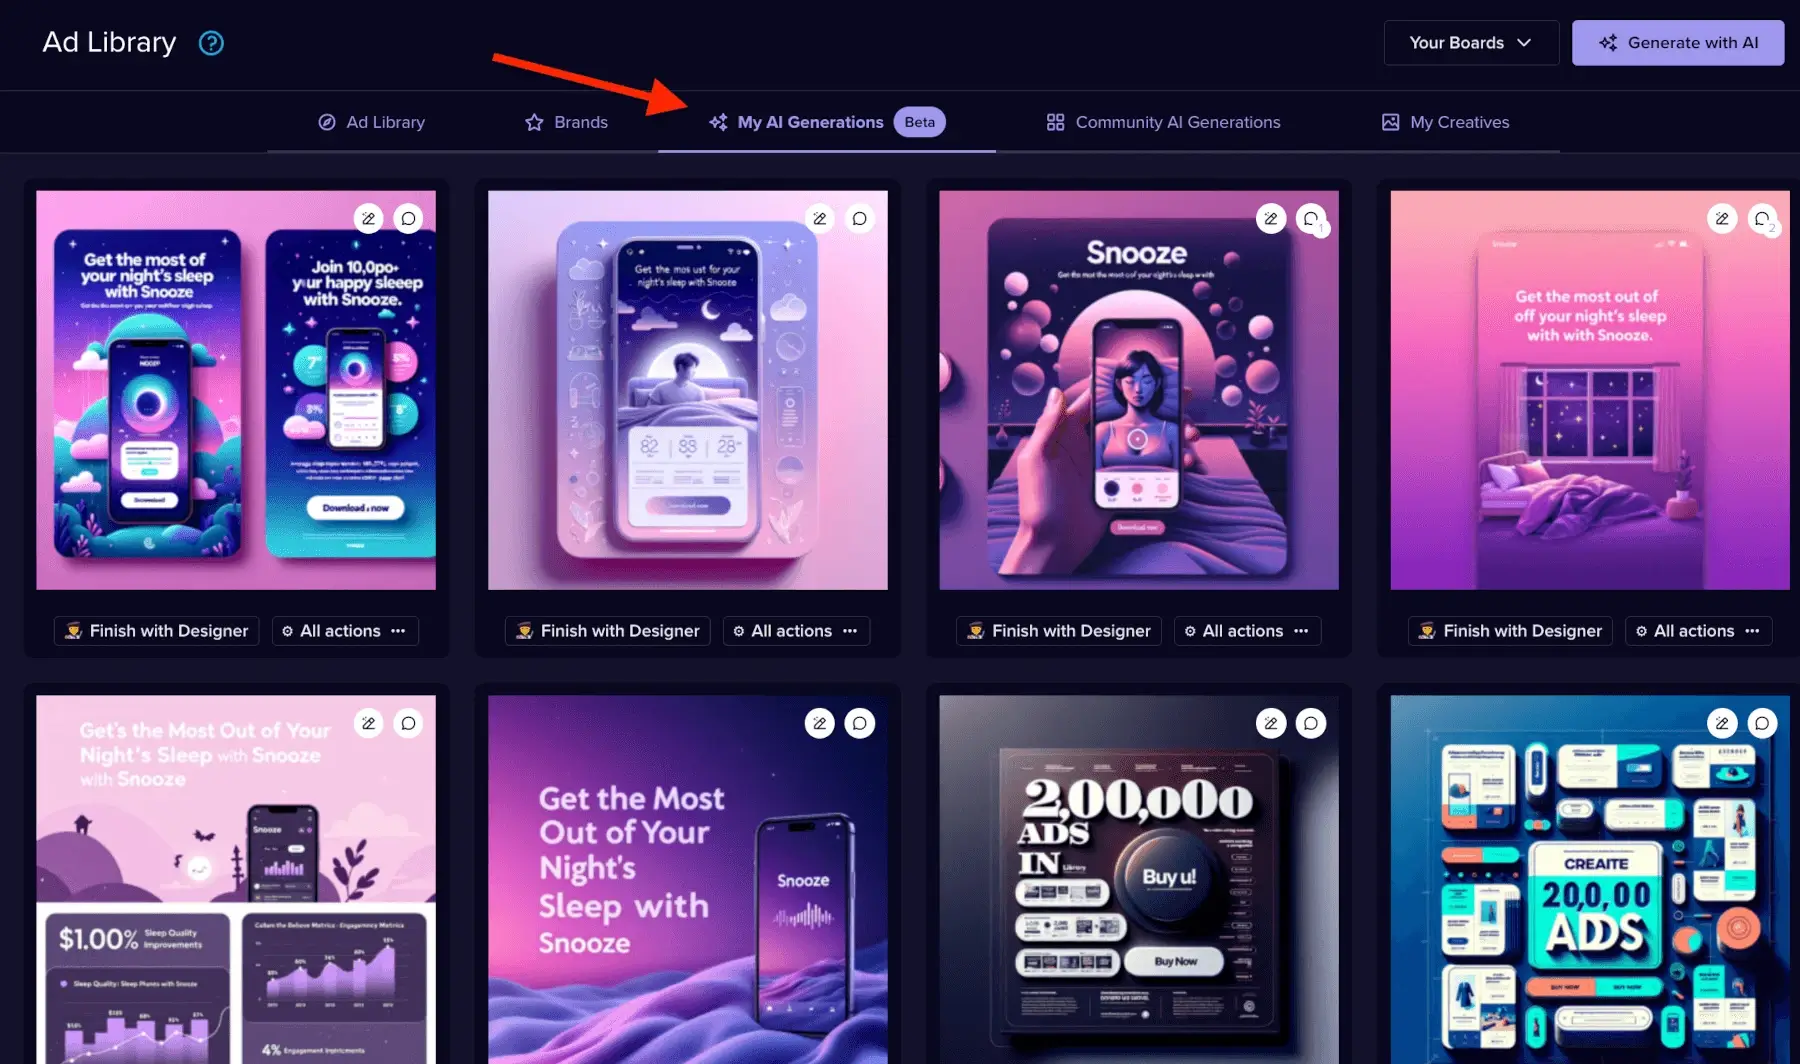
Click the “Start AI Generation” to begin generating a new batch of ads. You can find them in the “My AI Generations” tab.
Generate a new ad from an image prompt
If you have an ad example or image (of a product, for example) saved, you can use it to prompt the AI Ad Generator. Go ahead and click the “Generate with AI” button to start, and a popup will appear.
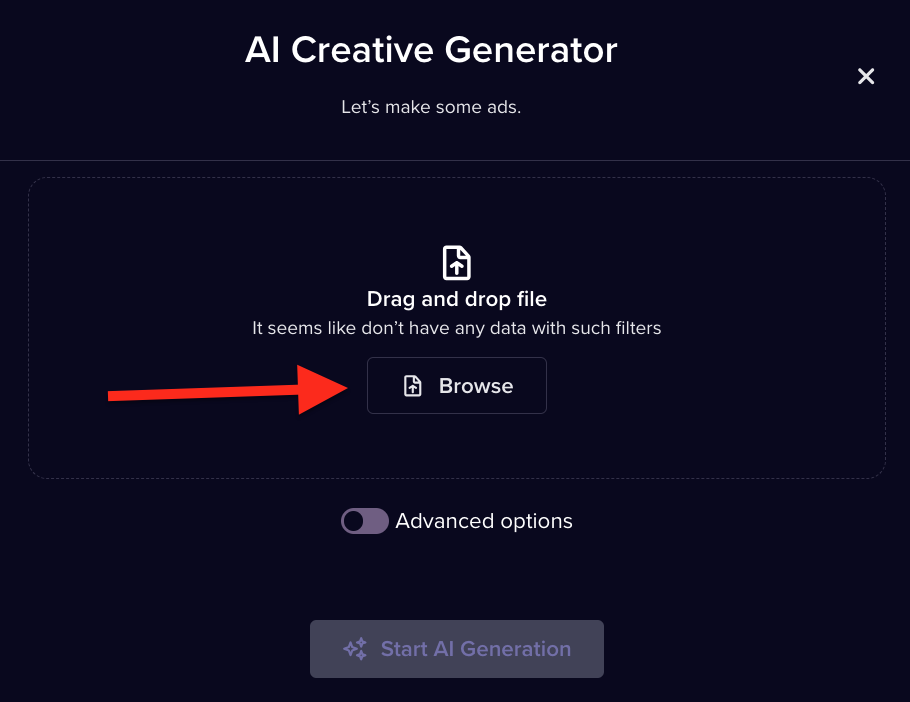
From there, you can upload your ad example to show the AI Ad Generator what you want to recreate. Drag and drop or browse your system to add the file to the “AI Creative Generator” popup.
Once your reference image is added, click “Start AI Generation.” Give the AI Ad Generator a few moments, and voila! You’ll see a batch of three options appear in your “My AI Generations” tab.
Generate a new ad using a text prompt
Click the “Generate with AI” button at the top right of the Ad Library page.
Instead of uploading an image, slide the “Advanced options” toggle on so that the “Description” text box appears. You can remove the default text that appears if you upload an image and type in your prompt.
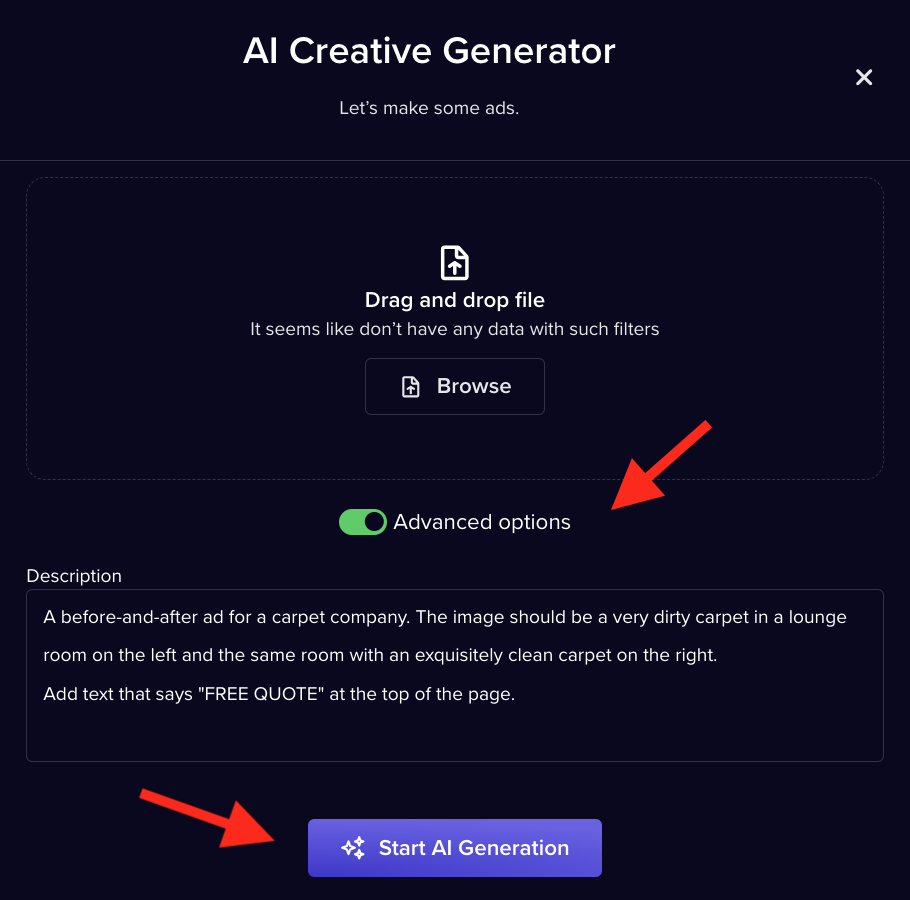
You can use a text prompt alone like I did in the picture above, or you can use text in addition to an image prompt. It’s better to include more details, especially if you want text in your ad, but the AI Ad Generator will still generate ads with either text or image prompts alone. This is super helpful when you’re running low on ideas.
When you’re ready, click the “Start AI Generation” button. You can then either continue browsing for ad ideas, or you’ll be taken to the “My AI Generations” to find your batch of ads.
Create a new AI ad image from the Ad Library
Use an ad you find in the Madgicx Ad Library as a reference when creating a new batch of ads with the AI Ad Generator.
Go to the “Creatives” icon in the main Madgicx menu, and then click “Ad Library” or head to the first menu tab on the top if you are already on the AI Ad Generator page.
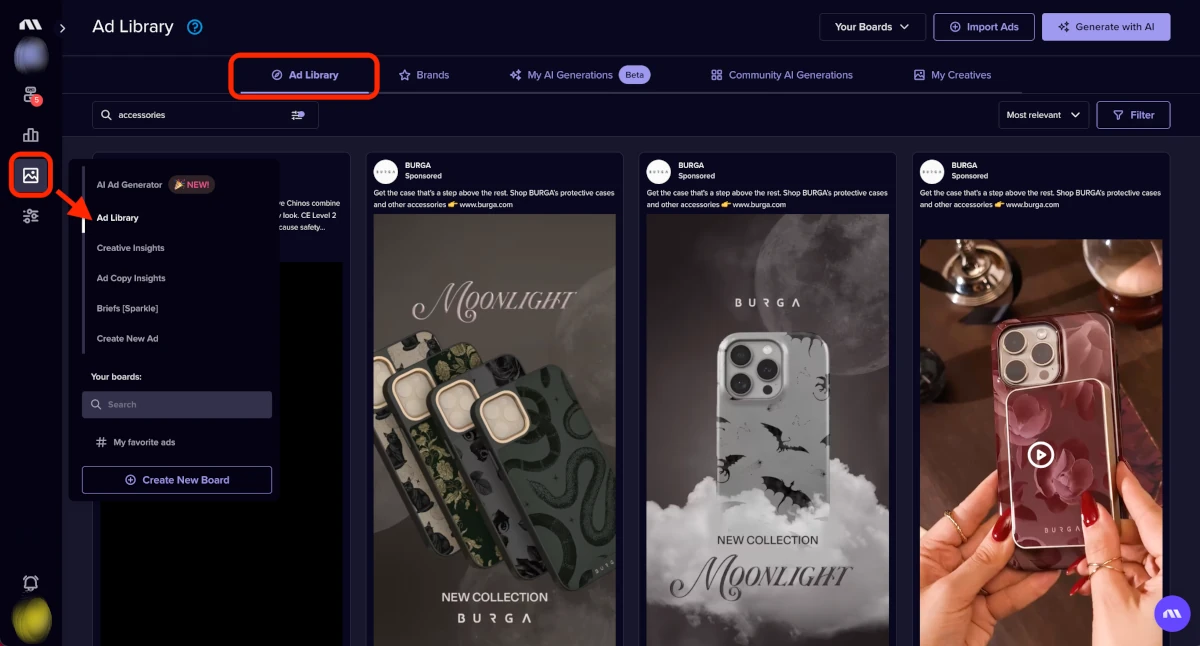
When you hover over an image ad in the Ad Library, an “Ad Gen AI” button will appear at the top right.
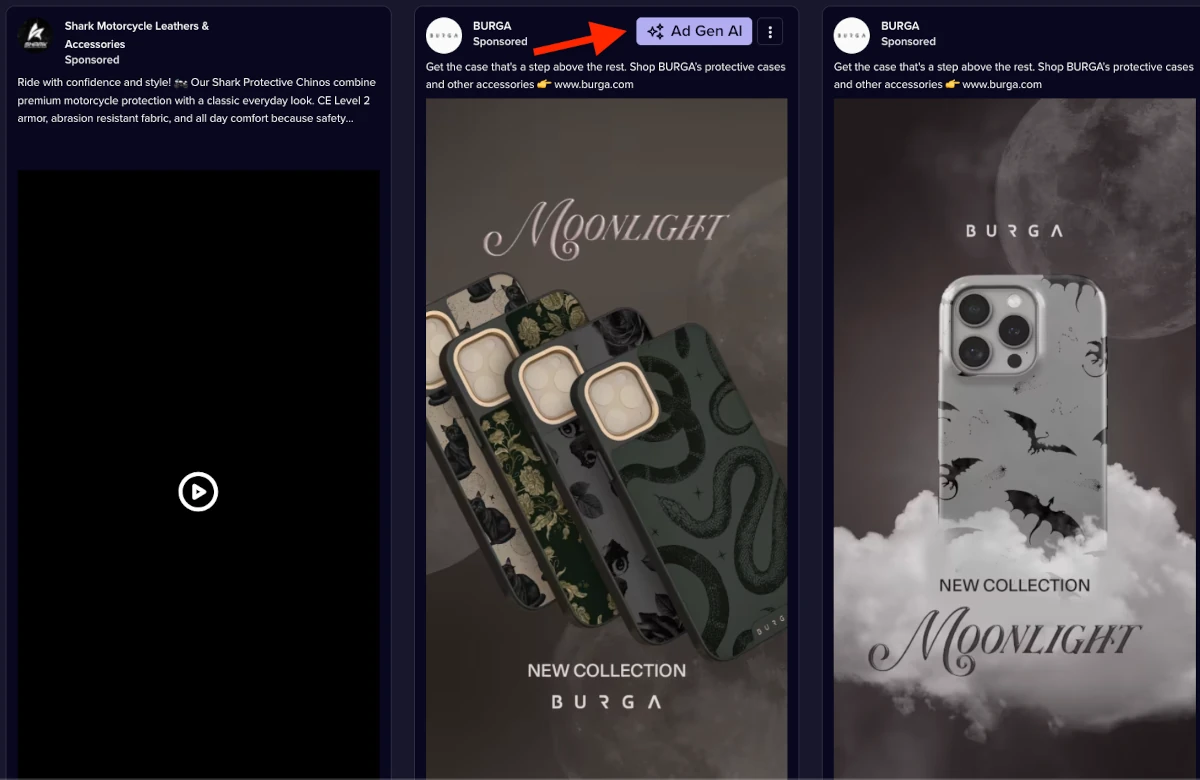
When you find an ad you like, click the “Ad Gen AI” button. The file will automatically be added to your prompt, and you can edit or add text to add more details about your ad by sliding on the ”Advanced options” toggle.
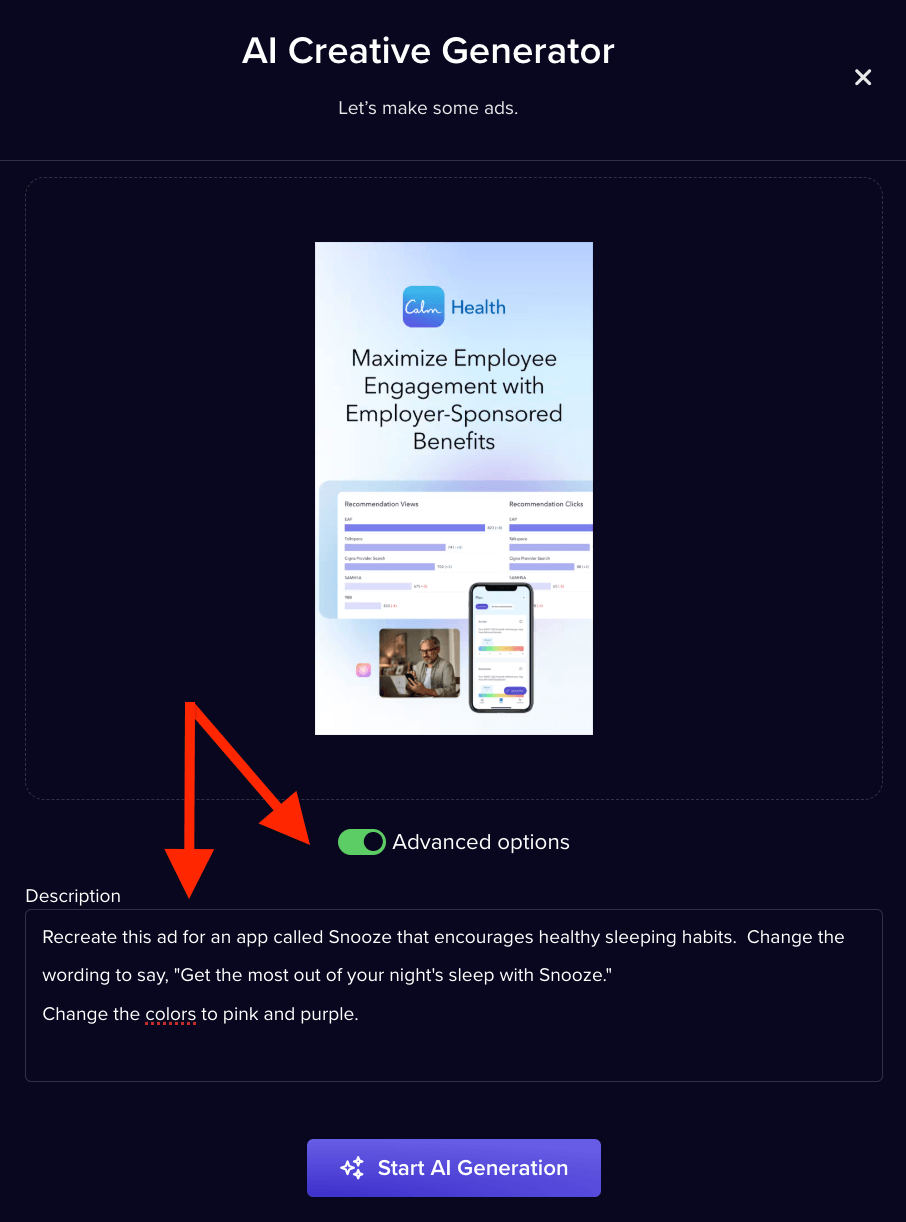
When ready, click “Start AI Generation” and go to “My AI Generations” to find your batch of AI-generated ads.
If there is one you like and you want to create more variations of it, you can click the “All Actions” button to open a menu from the “My AI Generations” page.
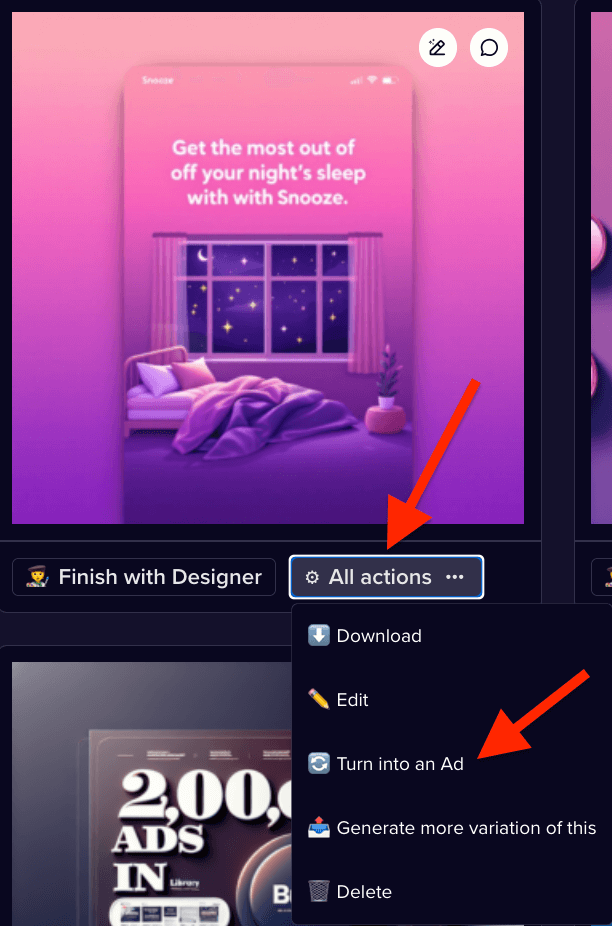
Click “Generate more variations of this” to create another batch or “Edit” to open the AI Image Editor. Or click “Turn into an Ad” to open the Ad Launcher. You can also download or delete the image here.
Edit your creatives with the AI Image Editor
The AI Image Editor lets you:
- Add text overlays
- Remove text or objects with the Magic Eraser
- Move and adjust the size of objects with Magic Move
- Upload images to add to your ad creative
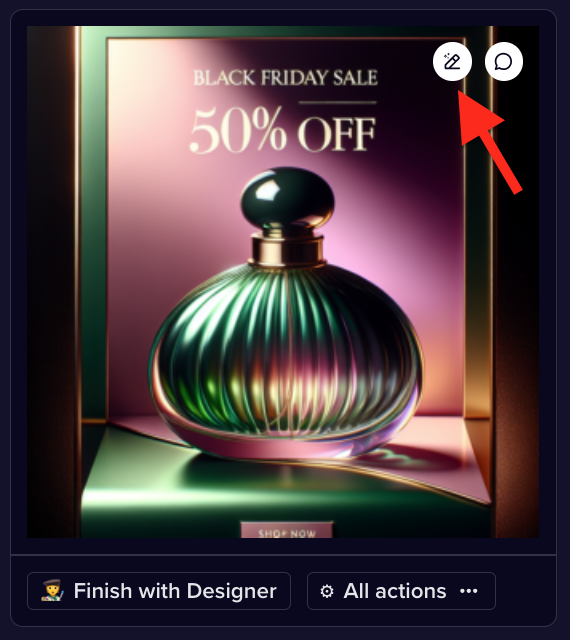
From the “My AI Generations” page, you can choose an image you want to use and click the edit pencil at the top right of the ad to open the AI Image Editor.
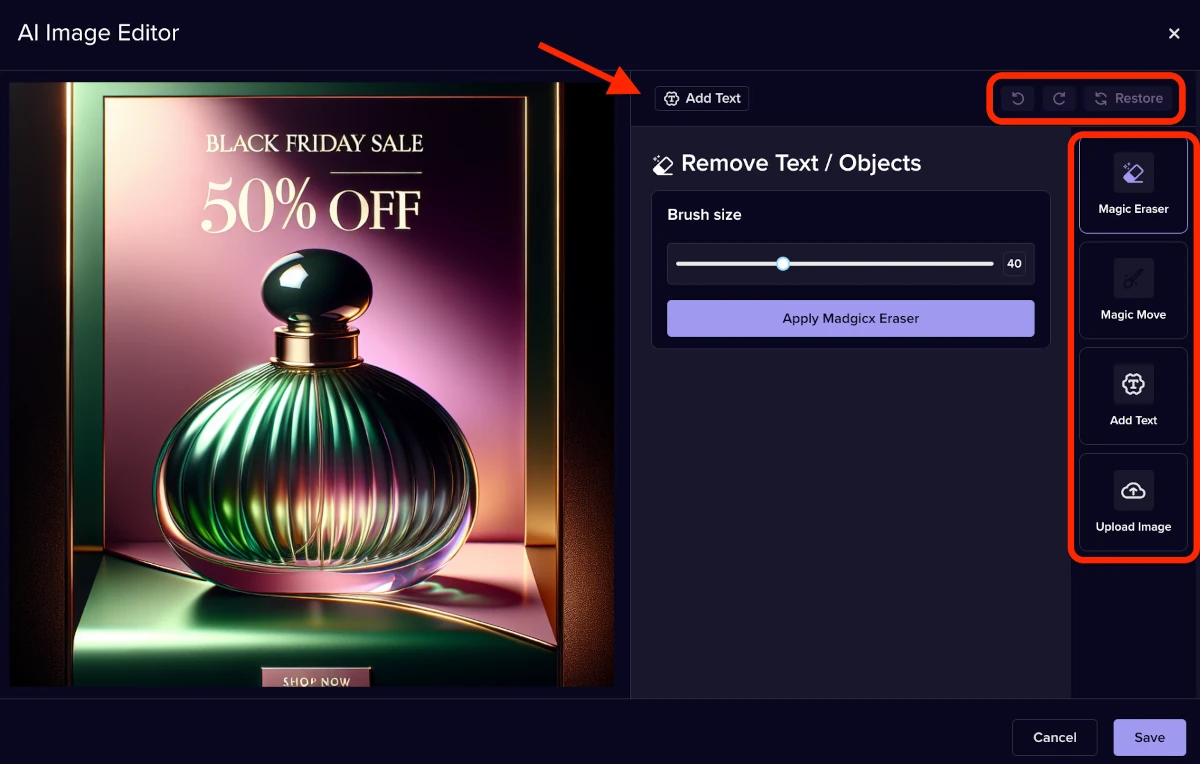
The AI Image Editor opens on the Magic Eraser screen. You can add text by clicking the “Add Text” button at the top, where you can select your font and colors and place the text on your ad. You can manage your edits or restore your creative to its original state on the top right. Additionally, you can change between tools down the right side of the editor.
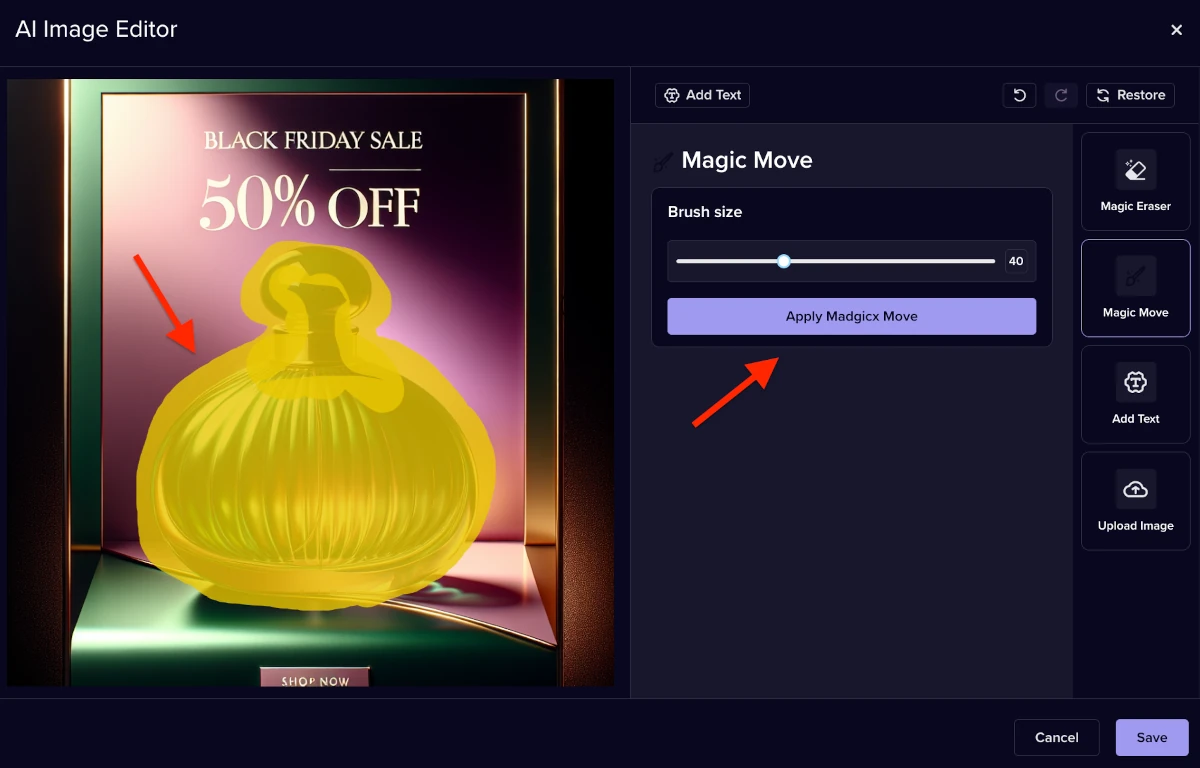
To edit your image, you can apply the brush to the text or objects you want to change. Adjust the brush size of the eraser according to what you want to amend.
To upload an image, you can simply drag and drop it or browse your computer files to find it.
Click “Save” when you are ready.
Difference with Meta AI
Didn't find what you were looking for?
Try our FAQ
Check out the answers to our most frequently asked questions. If you can’t find the answer there, you’ll be able to contact our support team.


