Madgicx Workspace settings explained
In this article, we explain how to navigate your workspace settings, where you can:
- Manage your connected ad accounts
- Change your subscription and add more products
- See your billing history and edit your payment method
- Customize your user profile
- Add team members

Navigate your Workspace settings in Madgicx
The “Workspace settings” page allows you to customize your Madgicx account to suit your preferences. You can find it by clicking your Facebook profile image at the bottom left of the screen, then “Manage connected ad accounts” in the menu that appears.

“Workspace settings” is where you control the ad accounts connected to Madgicx, monitor your monthly plan usage, add team members, oversee your subscription and products, manage billing information, and update your user profile.
When you click your profile pic at the bottom left, it opens the menu in the image below.
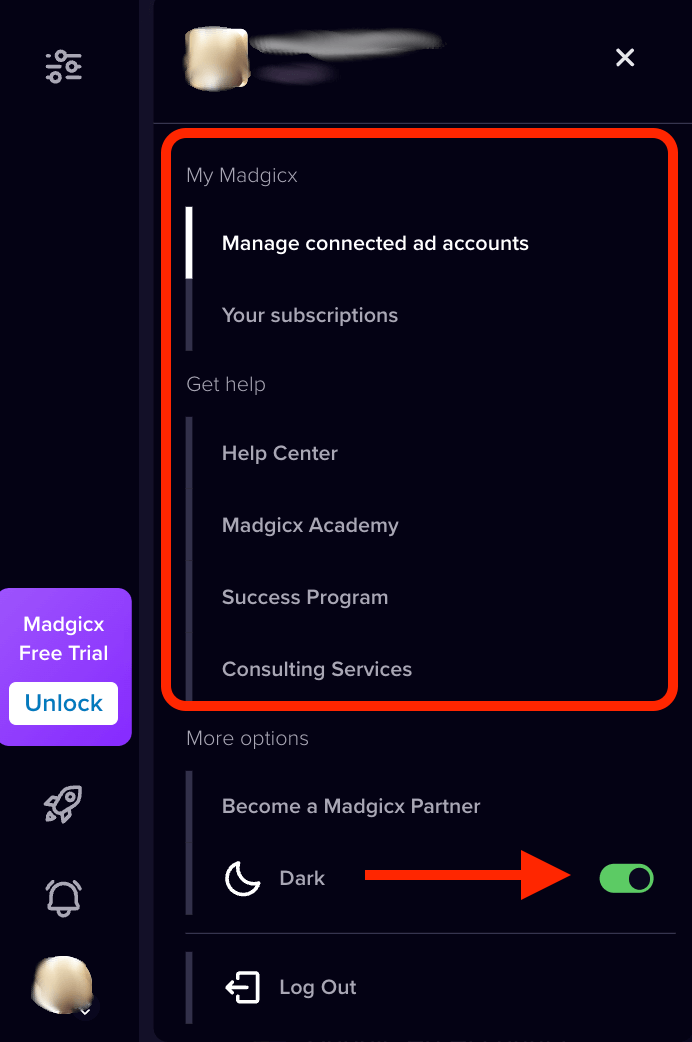
At the top, you’ll find your user profile name, your profile pic, and your user ID.
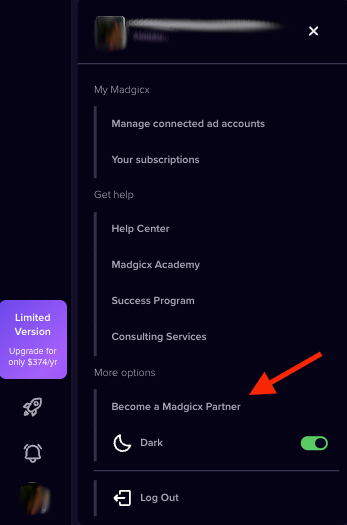
In the red box below it, you’ll find menu tabs to access your workspace settings in “My Madgicx” and our help materials in “Get help.”
My Madgicx
- Manage connected ad accounts - manage your ad accounts in workplace settings.
- Your subscriptions - view and manage your subscription and add-ons.
Get help
- Help Centre - dive into our in-app help materials
- Madgicx Academy - all our guides on using Madgicx to manage your Meta ads
- Success Program - set yourself up for success with the perfect Madgicx implementation. This is done over 6 one-on-one sessions to learn all you need to succeed.
- Consulting Services - meet periodically with our top Madgicxians to collaborate on your ad accounts to improve performance.
- Campaign Management Services (displays in the menu when you have an active subscription) - Let our agency take the wheel of your advertising with full account management.
More options
- Become a Madgicx Partner - Apply to become a Madgicx partner on our affiliate program.
Below this, you can find the toggle to slide dark mode on and off, and log out.
Head to the “Workspace settings” page by clicking “Managed connected ad accounts” at the top of the menu pictured above.
In “Workspace settings,” you’ll see menu tabs for:
- Ad accounts - see all the ad accounts you connected to Madgicx
- Products & Usage - manage your subscription and add-ons
- Payments - view your transaction history and access invoices
- User Profile - view or edit your user profile
- Team Members - add and manage members of your team
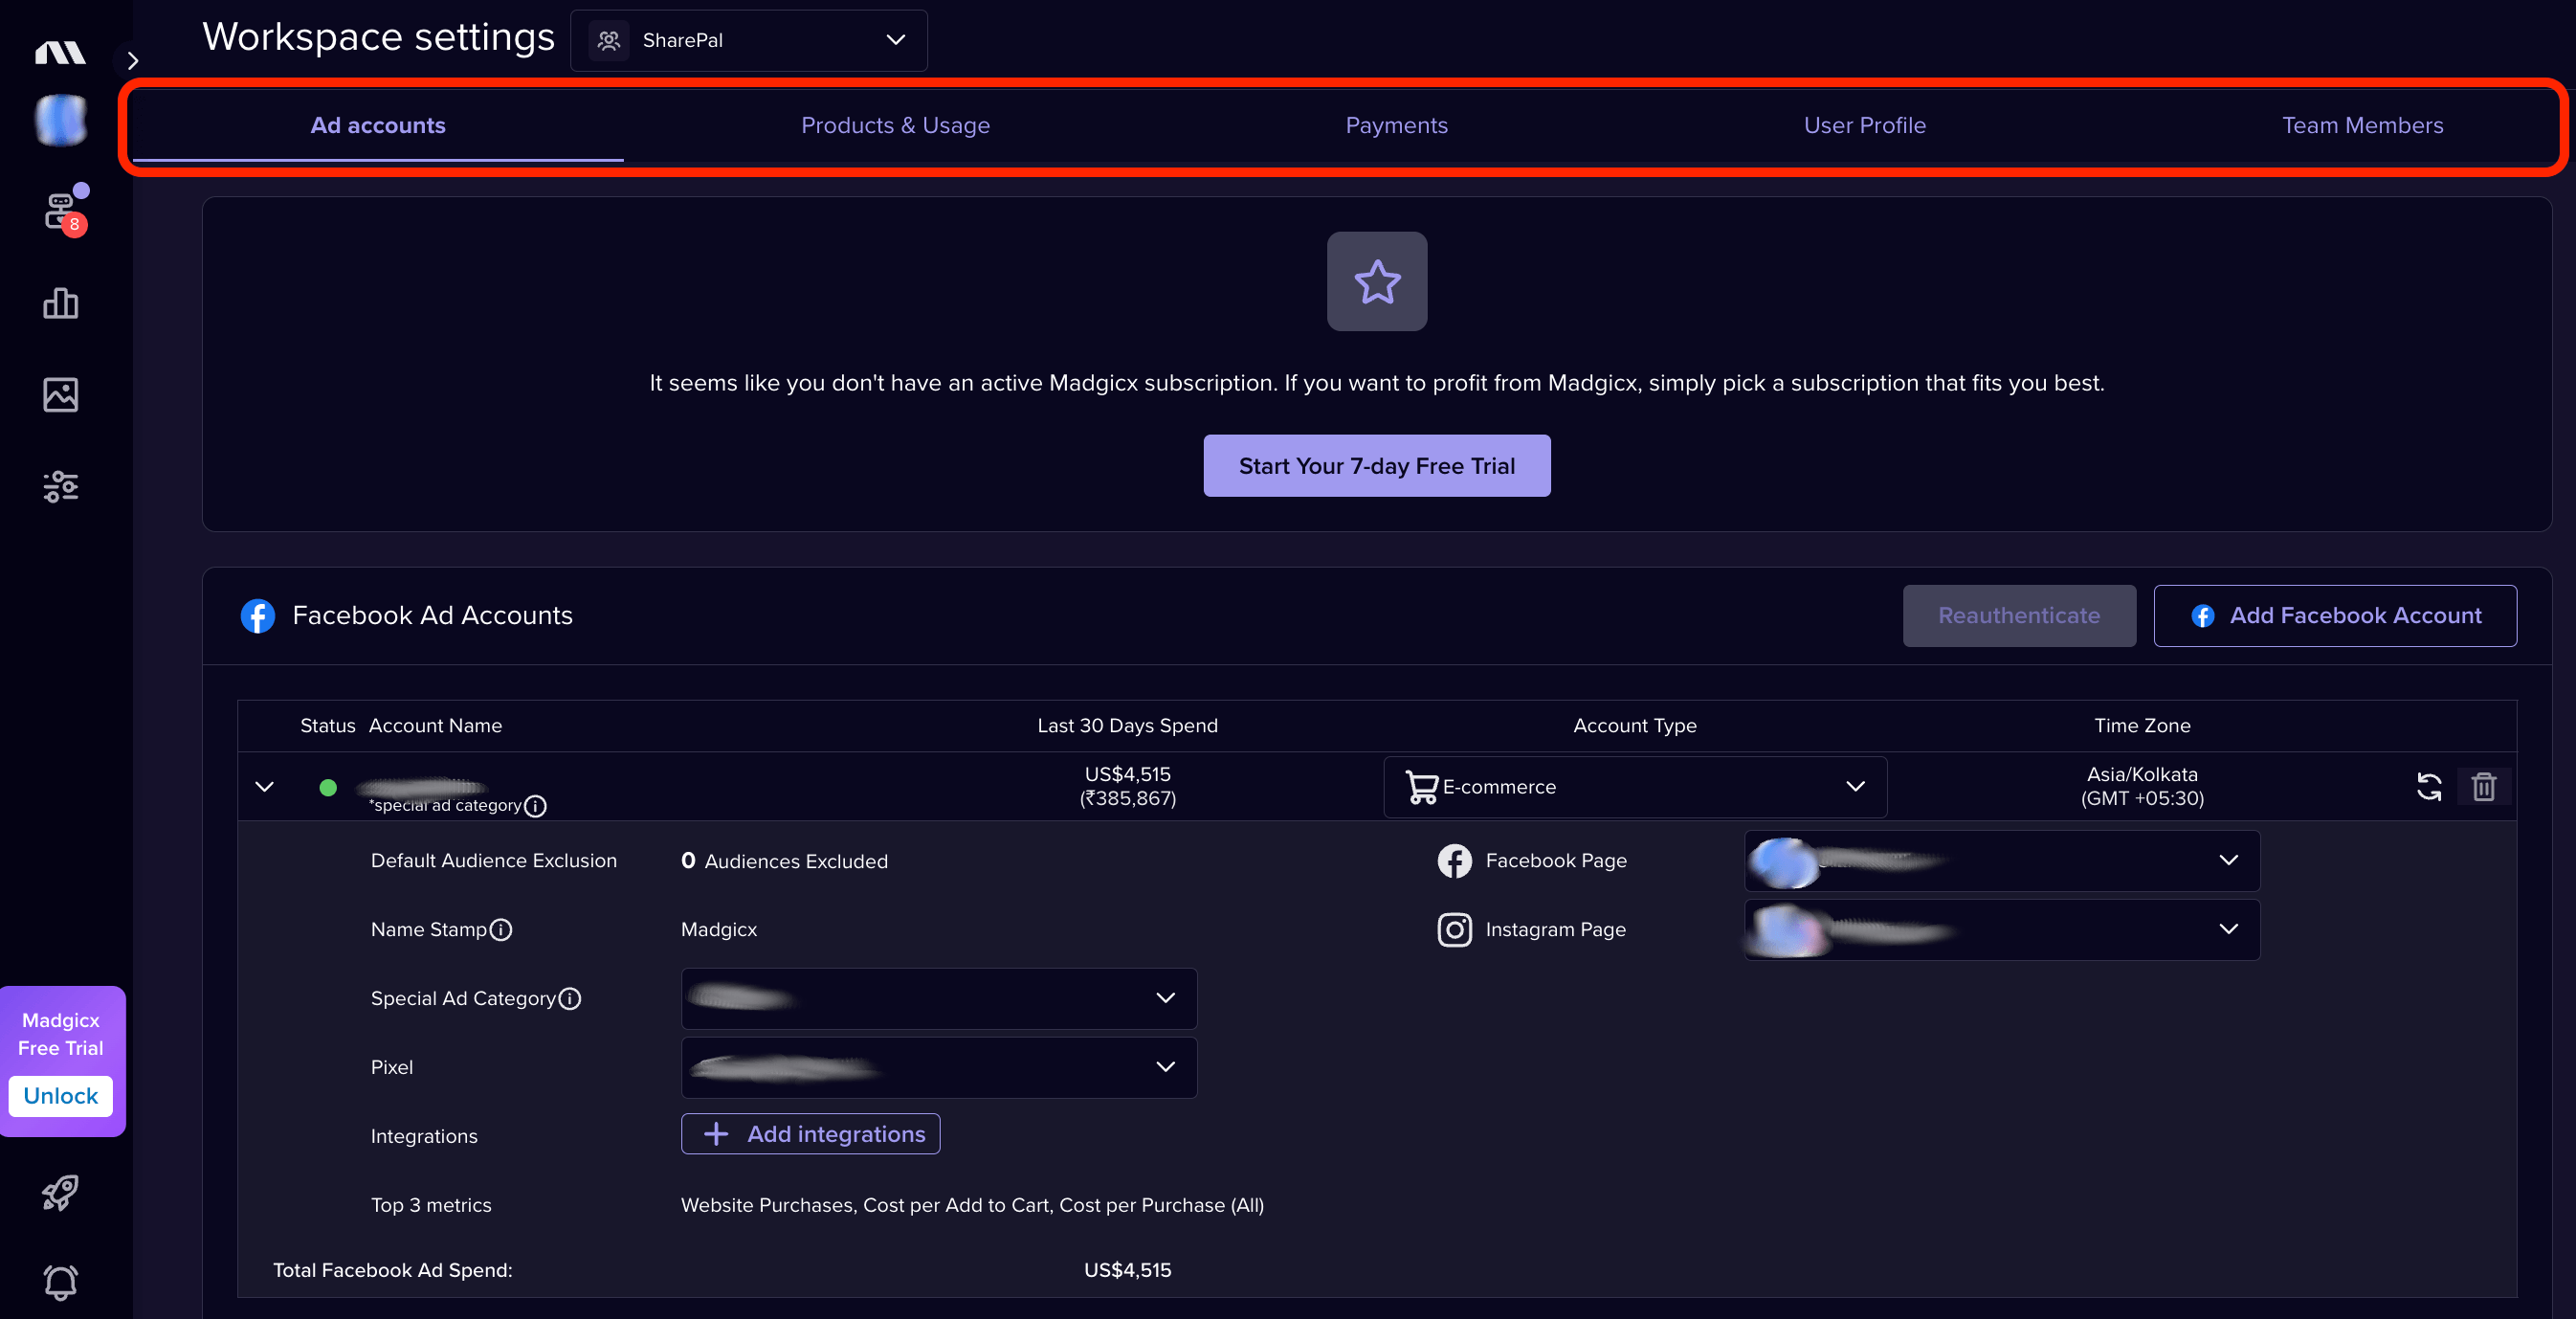
See and manage your ad accounts and connections
On the main “Manage connected ad accounts” page above, you can manage the accounts connected to Madgicx. You can:
- Add or remove ad accounts to and from Madgicx (Meta and Google Ads), and view all your connected ad accounts organized by platform.
- Reauthenticate your Facebook connection to Madgicx should any account become disconnected.
- See and change your Facebook and Instagram Pages and manage your Pixel.
- Adjust the top 3 metrics for your account.
- Add a name stamp to white-label your assets
- Set up audience exclusions for your account
- Select an industry for your ad account (or change previous selection)
Manage your subscription and add-ons
When you click on the “Products & Usage” tab, you’ll see the screen below where you can upgrade or change your plan, connect or remove ad accounts, and manage your subscription. You can read more about Madgicx plans and add-ons here.
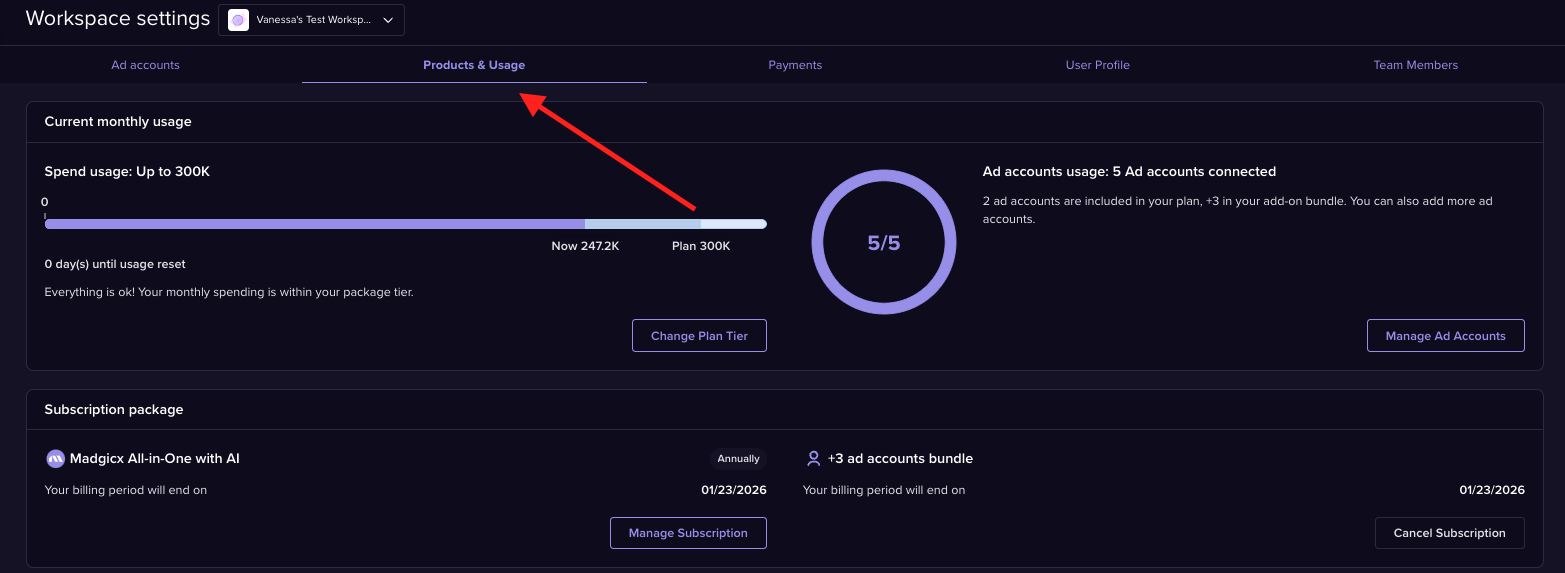
Then, you will see the “Add-Ons” section below where you can view available Madgicx Add-Ons and include them in your plan.
Below this, you’ll find recommended Add-Ons to enhance your overall ad account performance. You can edit your Add-On subscription by clicking the “Change Add-On plan” button.
Keep track of your payments and billing details 💸
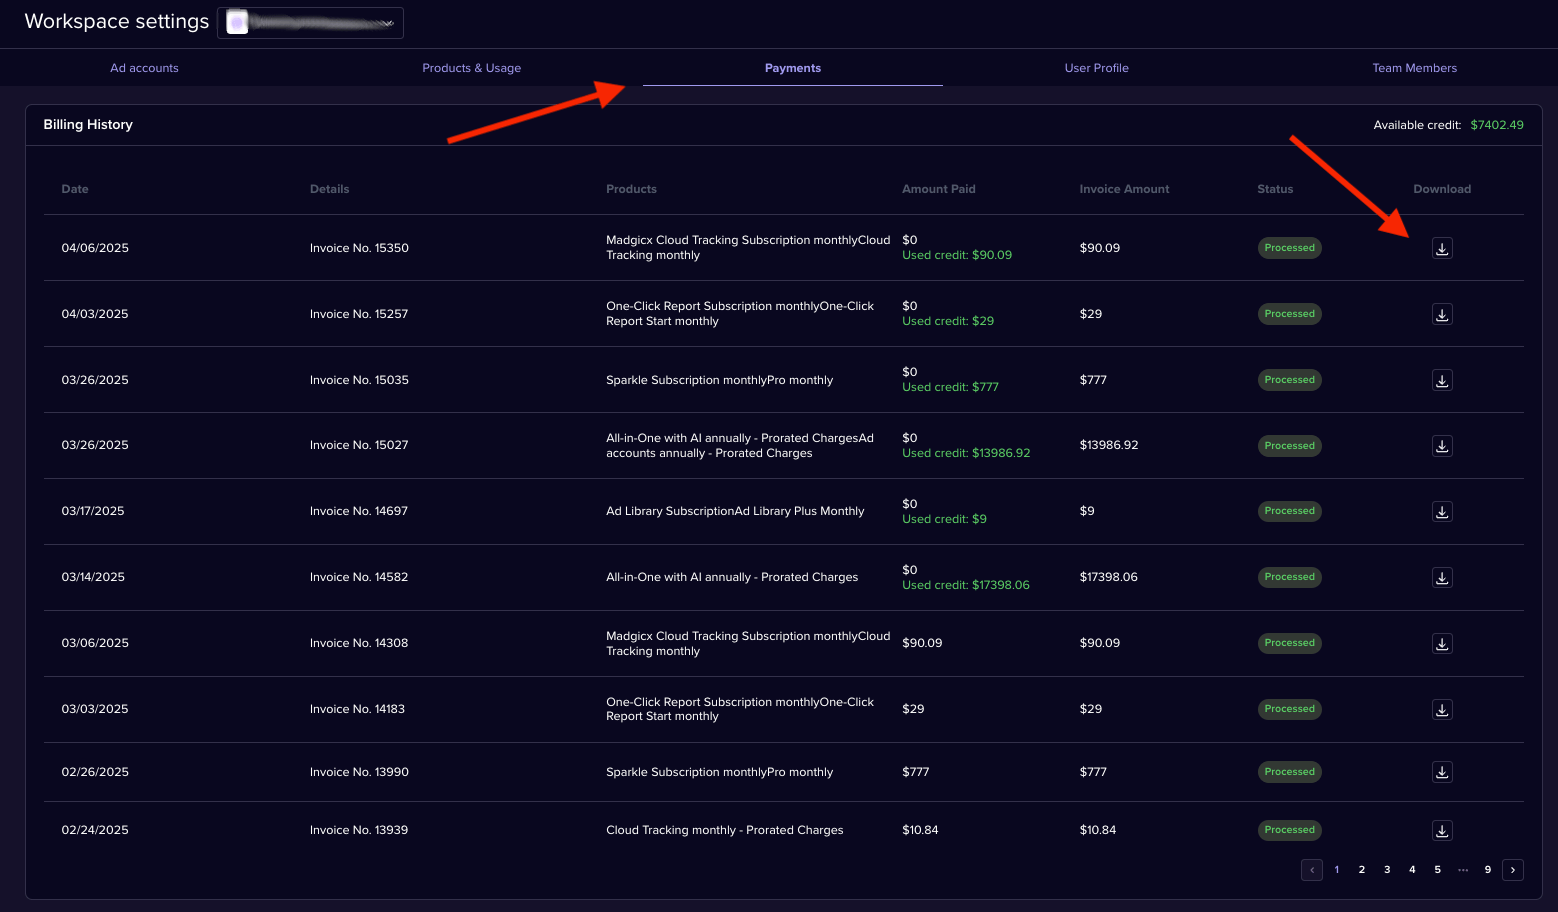
If you click on the “Payments” tab, you’ll see a section called “Billing History” and find a list of all your account transactions, the products you paid for each time, and the status of the transactions.
You can easily download your invoices by clicking the download icon in the Download column. Furthermore, if you have a credit, it’ll appear at the top right corner of the screen.
In addition, you can manage your payment methods in the section below. You can add multiple payment methods with your primary card set as the default.
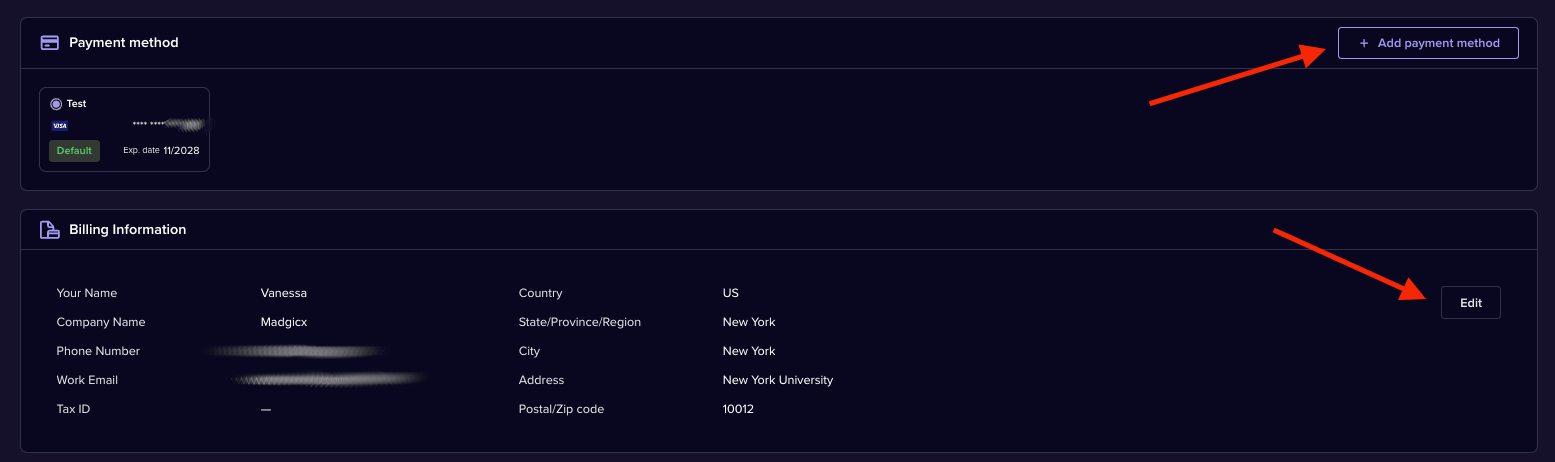
Below this, you’ll find the “Billing Information” section that you can edit by clicking the “Edit” button to the right of the screen.
Manage your user profile 🧑💻
The “User Profile” tab is where you can see the Facebook profile connected to your Madgicx account, and another place where you can find your Madgicx user ID.
You can edit your contact number and email here. However, it’s important to note that changing your email address here will not change the email address connected to your Madgicx account, only the email we use to contact you. It’s not possible to change this once your account is created.

Add team members to your workspace
The “Team Members” tab is where you can invite people to join your Workspace. Your team members use your Madgicx subscription to access the ad accounts you assign them.

You can follow our guide on how to add team members and find out more about how teams work in Madgicx by reading our article on the topic.
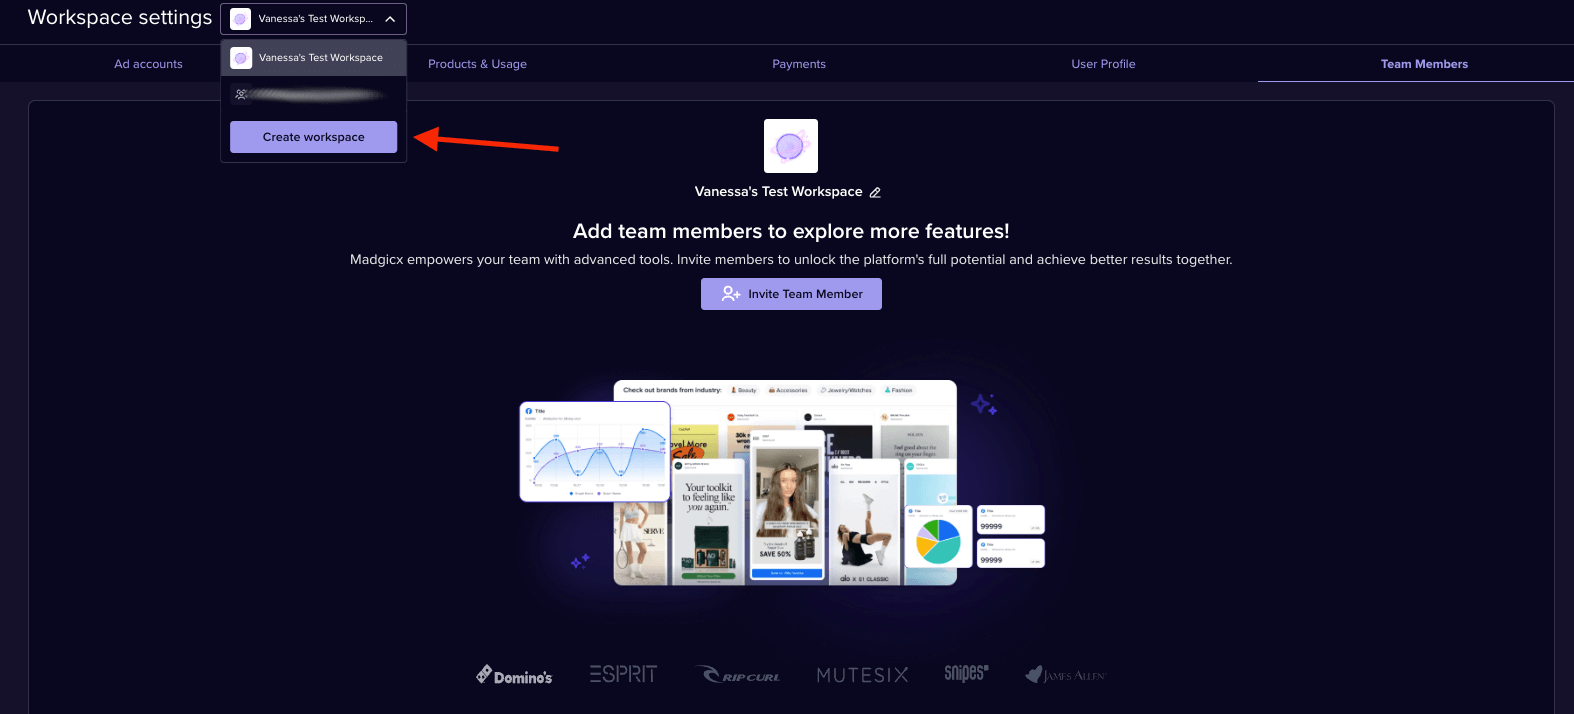
Agency or freelance pro tip: Create additional workspaces by clicking the drop-down menu showing your current workspace and clicking the “Create Workspace” button to make a new one. Keep in mind that with every new workspace, you create a new subscription.
Lastly, if you’re enjoying the Madgicx experience and have a network, you can apply to join our affiliate program. Do this by clicking “Become a Madgicx Partner” in the settings menu accessed from your profile pic at the bottom left.
And that’s it! Configuring your settings helps you get the most out of your Madgicx subscription.
Related lessons
Didn't find what you were looking for?
Try our FAQ
Check out the answers to our most frequently asked questions. If you can’t find the answer there, you’ll be able to contact our support team.